Showing posts with label baking. Show all posts

Friday, January 29, 2016

Coconut Flour Popovers


I think popovers are really delicious, easy, and fun.  My kids love to watch them puff up through the oven door and sink a little as they cool.  We are trying to eat less grains because of my husband, so this recipe is in his honor.  The addition of the coconut flour will make these slightly different from a regular popover, but they are still really easy and delicious.  Plus, it's always good to know a processed free version of any recipe, right?

2 Tbsp. butter
4 eggs
1/2 cup milk (use almond or coconut if you are dairy free)
3 Tbsp. coconut flour (accurately measure - don't approximate with this flour)
1/2 tsp. sea salt

Preheat oven to 425 degrees.  Cut off one tablespoon of cold butter at a time for a total of two, and slice each one in half, then each half into 3 pieces.  This should make 12 equal-sized, small pieces of butter.  Place each one inside a 12 count muffin tin and place this in the over to let the butter completely melt and the pan to heat up.  Watch that you don't allow the butter to burn while you are making the batter.  In a blender, pour in the eggs, milk, coconut flour, and salt.  Blend until smooth.  Remove the hot muffin pan with the melted butter and pour in the batter filling each cup about half full.  


Bake for 20 minutes or until puffed and golden.  Don't open the oven door while they are cooking or they will deflate and not rise again.  They will look very puffy when done, but shrink down as they cool.  You can eat these plain or top with an all fruit jam (no added sugar), more butter, or my favorite - a squeeze of fresh lemon juice and drizzle of real maple syrup!


Thursday, September 10, 2015

Cauliflower Pizza Crust


We have all been trying to go grain-free because of my husband and add more vegetables to our meals at our house.  I had really been wanting to try a cauliflower pizza and this gave me the perfect opportunity.  After doing a little research and tweaking this to my own preferences, our recipe for cauliflower crust pizza was born.  This has many steps, but all of them are easy - in other words, this is not fast, but it is simple.  It's also surprisingly filling - must be all the veggies.  My favorite thing is that it is processed free.  Let pizza night begin!

Makes 2 medium pizza crusts

1 large head of cauliflower
2 eggs (beaten)
1 cup shredded mozzarella
1 tsp. fine sea salt
1 tsp. Italian seasoning
1/4 tsp. black pepper

Toppings of your choice: sugar free pizza sauce, cheese, shredded zucchini, olives, bell peppers, mushrooms, pepperoni, ricotta cheese, etc.

Preheat oven to 450 degrees.  Line a baking sheet with parchment paper and liberally grease it with olive oil.  Chop the cauliflower into small pieces and pulse until finely chopped in a food processor - not pureed though.  Pour into a microwave safe bowl and heat for 8 minutes then let it cool enough to handle. 


Put small batches into a tea towel and twist to remove as much moisture as you can - it has to be dry!  You may have to do this in several batches like I did.


Transfer to a bowl and add the other ingredients.  Shape into two crusts on the oiled parchment and bake for 15 to 17 minutes. 


Should be slightly golden.  Cool a little and add your toppings.  Bake again for 10 to 15 minutes or until the cheese has melted and started to bubble.


Feel free to experiment with your own seasoning and toppings.  I also think this is easier eaten with a fork rather than picked up like a traditional pizza slice.  Give this a try - you may find you like eating more veggies! 

Tuesday, December 2, 2014

Whole Wheat Chocolate Chip Cinnamon Rolls


Some good friends of ours used to make these biscuit chocolate chip cinnamon rolls for our family and deliver them warm to our door.  Talk about irresistible!  When we moved away, I knew I wanted to get the recipe, but I wanted to try making these processed free.  What I found was that my kids loved them just as much as ever - success!  Because it's a biscuit dough, these are super simple, don't require a rise time, and there is no glaze or frosting needed.    

Dough:
2 cups whole wheat pastry flour
3 Tbsp. sucanat or coconut palm sugar
4 tsp. baking powder
1 tsp. salt
1/2 cup shortening (non-hydrogenated)
3/4 cup milk

Filling:
3-4 Tbsp. melted butter
sucanat
cinnamon
chocolate chips

Preheat oven to 450 degrees.  Combine the flour, sugar, baking powder and salt in a medium sized bowl.  Add the shortening and use a pastry cutter to combine them until it looks like crumbs.  Add the milk and stir into the dough.  Add a little flour to knead it into a ball.  Sprinkle flour on a flat surface and roll it into a flat rectangle.  Cover the flattened dough with melted butter and sprinkle the dough with the desired amount of sucanat, cinnamon, and chocolate chips.


Roll into a log and cut into 12 pieces - about 1 inch thick.  place on an ungreased cookie sheet and bake for 12 minutes. 


I use dental floss to cut them by sliding it under the log, then pulling the two sides to meet and make a nice cut without squishing the dough.  I also cut it in half first, then those two pieces in half and each of those into three to make the pieces pretty even. 

I know I'm a bit vague about the amounts for the filling, but you can really just eye ball what will cover the dough and how much or little you like of each component - ex. more cinnamon, less chocolate chips.  These are fast and very forgiving if you are allowing your kids to help in the whole process as well.  Have fun with it!

Tuesday, September 23, 2014

Mini Spelt Flour Pumpkin Spice Donuts


 It's the first day of fall!  I like fall, not winter so much, but pumpkin and apple everything is exciting!  My kids and I have been talking about the pumpkin patch and that got me thinking about all the pumpkin goodies.  I wanted to make something we could all enjoy that was delicious and processed free.  Why not pumpkin spice donunts?  These have no refined sugar or flour, but are just as good as any other pumpkin treat you will have this season.  I made them in my mini donut maker (thanks mom!), but you could do this in the oven with a regular size donut pan.  I'll warn you ahead of time - these are addicting.  You'll want it to be fall all the time!
 
1 3/4 cups whole spelt flour (I like sprouted spelt flour best)
1/2 tsp. cinnamon
1/2 tsp.nutmeg
1/2 tsp.allspice
1/8 tsp.ground cloves
2 tsp.baking powder
1/2 tsp.salt
3/4 cup pumpkin puree
1/2 cup milk
1/2 cup sucanat or coconut palm sugar
1/3 cup melted coconut oil
1 large egg
1 tsp.vanilla extract
 
For the cinnamon sugar topping:
2 Tbsp. cinnamon
2/3 cup coconut palm sugar
4 Tbsp. melted butter
 
In a large bowl, combine flour, cinnamon, nutmeg, allspice, cloves, baking powder and salt.  In a separate bowl, mix the pumpkin puree, milk, sucanat, coconut oil, egg and vanilla.  Pour the wet ingredients into the dry ingredients and combine using a rubber spatula just until moist. Scoop this into a gallon size zip-top bag and cut the bottom corner to create a piping bag.
 

When the mini donut maker is heated, pipe the batter in a circle inside each donut shape.  Close the lid and wait until they are cooked through.  Place on a sheet of paper towels to cool completely.  Dip each donut top in the melted butter and then into the cinnamon-sugar mixture. The batter is not overly sweet for this very reason.  Now, devour!  I'm not going to lie, these are fabulous with some homemade apple cider!  You could also enjoy these while sitting on your back porch cuddled up with a blanket watching the fall leaves - just saying.


Tuesday, September 2, 2014

Apple Cake


My sister's birthdays are two days apart, so when they celebrate with a birthday dinner, this has always been their requested birthday cake for as long as I can remember.  It's hearty, rustic, and full of deliciousness.  I asked for their permission to attempt to make this completely processed free before their last birthday to see if it would measure up.  Boy, did it!  I don't think we'll ever go back to the original.  Here is my take on a family favorite:

1 cup melted coconut oil
2 cups coconut palm sugar
2 eggs
3 cups sprouted whole wheat or whole spelt flour
1 tsp. baking soda
1 tsp. salt
1 tsp. cinnamon
2 tsp. vanilla
3 cups finely diced or grated apples
1 cup dark chocolate chips
1 cup chopped walnuts

Preheat the oven to 350 degrees.  Grease a 9X13 pan with additional coconut oil or butter and set aside.  In a large mixing bowl combine all the ingredients.  Bake for 30-35 minutes.  Cool and cut like brownies.

I like to use mini chips or cut up chocolate bars for this recipe.  We have also tried it with different nuts like pecans and it's just as amazing.  We have never put a frosting on this, however we often serve it with a dollop of homemade whipped cream - make it clean!  Who knows, this may just be your next birthday cake!

Tuesday, January 7, 2014

Clean Oatmeal and Spelt Flour Chocolate Chip Cookies


I know this is a horribly long title for a cookie, but I didn't want to leave out any of it's virtues.  In fact there are more to share.  This cookie is also wheat free, dairy free, and egg free.  Now that would make for a really long title!  And even though it is processed free, it is NOT taste free.  In fact, this is my very favorite cookie - hands down!  I think it has every bit of flavor that a regular cookie has, but nothing bad that your body can't recognize.  Really, how many recipes can boast that?  If you love cookies, give this a try.  I promise you won't be disappointed!

1 1/4 cups whole spelt flour (sprouted spelt if you can find it)
1/4 cup oat bran (you can also use quick oats or regular oatmeal that is slightly ground in a food processor)
1 tsp. baking powder
1/2 tsp. baking soda
1/4 tsp. salt
1/4 cup sucanat or coconut sugar
1/3 cup pure maple syrup
1/3 cup coconut oil, warmed to a liquid
1 1/2 tsp. vanilla extract
1/2 cup chocolate chips (I like dark chocolate, but you could also get grain-sweetened or carob chips)

Preheat the oven to 350 degrees.  Mix together the flour, oats, salt, baking powder, baking soda, and sucanat.  In a separate bowl, combine the maple syrup, coconut oil, and vanilla.  Pour the wet ingredients into the flour mixture and stir until they are combined.  Stir in the chocolate chips and spoon about a 1/2 tablespoon size onto a parchment or silpat lined baking sheet.  I use a cookie scoop and make it about halfway full.  The cookies will spread, so make them pretty round - about 12 cookies will fit on the sheet.  Bake for 9 to 10 minutes.


These cookies will be a little delicate when you first take them out of the oven.  Let them cool on the baking sheet for a few minutes, then transfer them to a wire rack.  They will seem overly soft, but will firm up once completely cool.  I always get about 2 dozen cookies from this recipe, but you could make them bigger and get less cookies overall - your call, just increase the baking time to 11 to 15 minutes. 

I think these would also be delicious with chopped walnuts.  If you want to add some, keep it anywhere from a 1/4 to 1/2 cup.  Make - bake - eat - you're welcome!

 
This was the flour I used.  I like it because it is sprouted which means more nutrition and will digest as an alkaline food rather than an acid.  And here is my kitchen.  I just loved that for one moment it was clean with freshly baked cookies - all was right with the world!


Tuesday, August 20, 2013

Coconut Flour Brownies


 So, I've been experimenting more with coconut flour.  The results have been mixed.  Some recipes I like, and some I don't.  This recipe for coconut flour brownies, is one that I do like.  I don't remember where I got the original recipe, but I didn't have to change much seeing as it was already a mostly processed free mixture.  You can taste the undertones of coconut in this, so if you like that flavor, you will love these brownies!
 
1 cup + 2 Tbsp. unsweetened cocoa powder
1/2 cup + 2 Tbsp. coconut oil (melted)
3/4 cup honey or pure maple syrup
3 eggs
1/4 cup coconut flour
1/4 tsp. sea salt
1 tsp. vanilla
 
Preheat the oven to 350 degrees.  Grease an 8 X 8 inch baking dish with coconut oil.  Mix all the ingredients in a bowl until they are smooth.  Spread the batter all over the baking dish.  It will be thick as the picture shows, so make sure to spread it evenly all over including the corners.
 
 
Bake for 17 to 20 minutes.  You want it to be moist and not too dry.  Go for a lower cooking time to make these really fudgy!
 
 
Let them cool completely then cut and enjoy!  You can even put them in the refrigerator to help this process along.  I also think they cut best with a plastic knife.  No refined flour so these are gluten free, and no refined sugar so they are much healthier.  Now that's a great dessert!

Thursday, May 23, 2013

Orange Molten Chocolate Cake


I was watching food network which is one of my favorite channels, even though I rarely get to watch it with kids around, and Melissa d'Arabian made this orange chocolate lava cake.  It looked so simple and elegant, but was super easy.  I knew that with a few math conversions, I could turn this into another delicious processed free dessert to have on hand.  I love the combination of chocolate and orange, and if you do to, then you've got to try this! 

Makes 4 individual sized cakes:

4.5 oz bakers chocolate
4 1/2 Tbsp. sucanat
4 Tbsp. unsalted butter
1 Tbsp. coconut oil
zest of 1 orange

1/4 cup sucanat
1 whole egg plus 1 egg yolk
1 Tbsp. whole wheat pastry flour
1 tsp. vanilla extract
1 orange, cut into supremes (segments)

optional: sea salt for sprinkling, oil for drizzling

Preheat oven to 375 degrees.  Grease four sections of a muffin tin with coconut oil.  Melt the chocolate, sucanat, butter and oil in a bowl in the microwave at 30 second intervals until it stirs together smoothly.  Don't put it in too long or it will burn.  Stir in the orange zest and let cool.

In a medium bowl, whisk the sucanat, eggs and yolk for about 2 minutes.  Whisk in the melted chocolate mixture.  Stir in the flour and vanilla until it is all smooth.  Divide the batter into the four greased sections of the muffin tin.  Bake the cakes until just barely dry on top - 10 to 12 minutes.  Remove from the oven and let them cool for about 5 minutes.  

Gently flip them onto a plate.  Top with the orange segments.  You can also sprinkle on some sea salt and drizzle a little melted coconut oil or olive oil over the top as well.  

These will be a little crusty on the outside and gooey on the inside.  If you want it more lava-like, put it in for less time.  Enjoy!


Monday, April 22, 2013

The Best Baking Powder


If you look closely at the label on this baking powder, you will notice it says aluminum free.  Once I ran out of my old brand, I started purchasing only aluminium free for a couple of reasons.  One is for taste.  If you've ever experienced any of your baked goods tasting a little "tinny," this was the reason why.  So, the simple fix is to switch baking powders.  The other reason I chose to bake with this instead is that there are some possible health risks due to over consumption of aluminum (ex. greater risk for Alzheimer's) and I would rather just cut out as much aluminum as I can, where I can.  If you can't find this, you can make your own, just do this in small batches.

Aluminum-Free Baking Powder
1 Tbsp. baking soda
2 Tbsp. cream of tartar
1 1/2 Tbsp. cornstarch (organic)

Mix together and store in an air-tight container.  Moisture will reduce it's effectiveness.  


Sunday, April 14, 2013

Coconut Cake with Coconut Cream Cheese Frosting


Do you like coconut?  Then you are going to love this cake!  I started to really love coconut when I spent an entire summer in Hawaii in my early twenties.  I couldn't seem to get enough of all things coconut.  As a result, I love all the products that come from this amazing plant.  This particular recipe calls for coconut flour, coconut oil, and shredded coconut to give it the rich coconut flavor without the need for artificial flavors.  I originally found this recipe here, and I didn't change it too much.  It has no refined sugar or flour and it's actually grain free.  It's super moist and tastes very sophisticated.  I promise you won't know this is processed free.


For the cake:
10 eggs
1 cup coconut oil, melted
1 cup pure maple syrup
1 Tbsp. vanilla extract
3/4 cup coconut flour
1 tsp. baking soda
1 tsp. sea salt
1 cup unsweetened shredded coconut
 
Preheat the oven to 325 degrees.  In a large bowl combine the eggs, coconut oil, maple syrup, and vanilla.  Add the coconut flour, baking soda, and salt and continue to blend.  Once this is smooth, stir in the shredded coconut.  Grease two 9 inch cake pans with coconut oil and divide the batter between both pans.  You could add parchment paper to the bottom of the pan to make for easy removal, but it's not necessary.  Bake for 30 to 35 minutes or until a toothpick comes out clean.  Cool completely before removing from pans and frosting them.


For the frosting:
16 oz. cream cheese
1/2 cup pure maple syrup
1 Tbsp. vanilla extract
1 cup unsweetened shredded coconut

Let the cream cheese soften to room temperature.  Using a hand mixer, combine the cream cheese, maple syrup and vanilla and blend until smooth.  Stir in the shredded coconut.  You can spread this on the cake right away or refrigerate it for later. 

This makes enough frosting to cover the cake and fill the middle of the two cake layers.  If you want to cut each layer, making this into a four-layer cake, make more frosting.  I also like to sprinkle a little more of the shredded coconut on the top right after I frost it.  Delicious!!


Tuesday, April 2, 2013

Clean Vanilla Extract


Did you know that most vanilla extracts on the market have sugar in them!  I didn't until I started going processed free and now read EVERY label of the food I buy.  Why wasn't I reading more labels before?  It just goes to show you that on the whole we have no idea what we are putting in our bodies until we increase our awareness.  Because of this, I now look for pure vanilla extract that has NO sugar added.  I also try to get organic whenever possible too.  This is a brand that I like and can buy locally, but there are other brands out there with no sugar added as well.  In addition to cutting out sugar, I think pure vanilla makes your recipes taste better anyway.  It's a win-win.  Next time you run out of vanilla and need to buy more, purchase a better quality product and cut out the hidden sugar!

Wednesday, March 20, 2013

Clean Chocolate Cake


This happens to be my favorite chocolate cake!  It has a very surprising ingredient and if you didn't know what it was, you would probably never guess.  This is a flourless cake, but has the consistency of a traditional fluffy crumb and is super moist due to ... black beans.  What?  I know, it sounds crazy, but this is a great swap for refined white flour in chocolate cakes and brownies.  You can use a can of unseasoned black beans (drained, rinsed, and pureed) for every cup of flour.  I found a similar recipe at LowCarbFriends and tweaked it to make it processed free for my family.  Trust me when I say you will never know the flour is gone - you won't miss it!

1 (15oz.) can unseasoned black beans
5 eggs
1 Tbsp. pure vanilla extract
1/2 tsp. salt
6 Tbsp. unsalted organic butter or coconut oil
1 to 1 1/4 cups sucanat or coconut sugar
6 Tbsp. unsweetened cocoa powder
1 tsp. baking powder
1/2 tsp. baking soda
1 Tbsp. water

Mint Chocolate version: 2 tsp. pure mint extract in place of the vanilla

Preheat oven to 325 degrees.  Grease a 9 inch round cake pan or an 8X8 inch pan with coconut oil.  Drain, rinse, and puree the black beans in a blender.  Add 3 of the eggs, vanilla, and salt and blend until everything is completely liquefied - no bean lumps.  In a separate bowl, mix the the cocoa powder, baking soda, and baking powder and set aside.  In a larger bowl, beat the butter/coconut oil with the sucanat/coconut sugar until well incorporated and fluffy.  Add the remaining 2 eggs beating each one at a time.  Add the bean mixture and beat together.  Finally, add the cocoa powder mix and water and beat on high for another minute until smooth.  Scrape batter into the pan and smooth out the top.  Bake for 40-45 minutes.  Cake will be done when it is firm to the touch.  Let the cake cool completely and then cover with plastic wrap.  If you want turn it out, wait 10 minutes after you take it out then flip it out onto a cooling rack.  For the best flavor, make this cake in the morning or let it sit overnight - it won't have even a hint of beans.  You can cut and stack this cake or make these into cupcakes instead.  Store leftovers in the refrigerator.

I purposely showed this without frosting because there are so many options.  I like a clean cream cheese, a clean chocolate, a clean version of a ganache or even an avocado frosting (I'm working on that recipe right now - it's almost perfected and ready to post.)  So frost how you want or eat as is with a scoop of clean ice cream (recipe here.)  I hope you love it as much as me and my family.


For cupcakes, fill these pretty full as they won't rise much.  You'll probably get anywhere between 15 to 18 cupcakes.  Bake for about 20 minutes.  You can also try using a hotter oven temperature and baking them for less time.  In theory, this should help them rise a bit more.

Wednesday, March 6, 2013

Whole Wheat Biscuit Pizzas


My kids are probably like all kids and love pizza.  Now, we do make a processed free pizza crust, but it takes a while because of the rise time.  So, when they want something faster (and me too) the perfect solution is using biscuit dough for the crust.  I can't tell you how fast this is and it's really easy for everyone to work with.  But, don't go out and buy a tube of refrigerator biscuits, make your own.  I promise it's even quicker than going to the store to buy some anyway.

2 1/4 cups whole wheat baking mix (found here)
2/3 cup milk

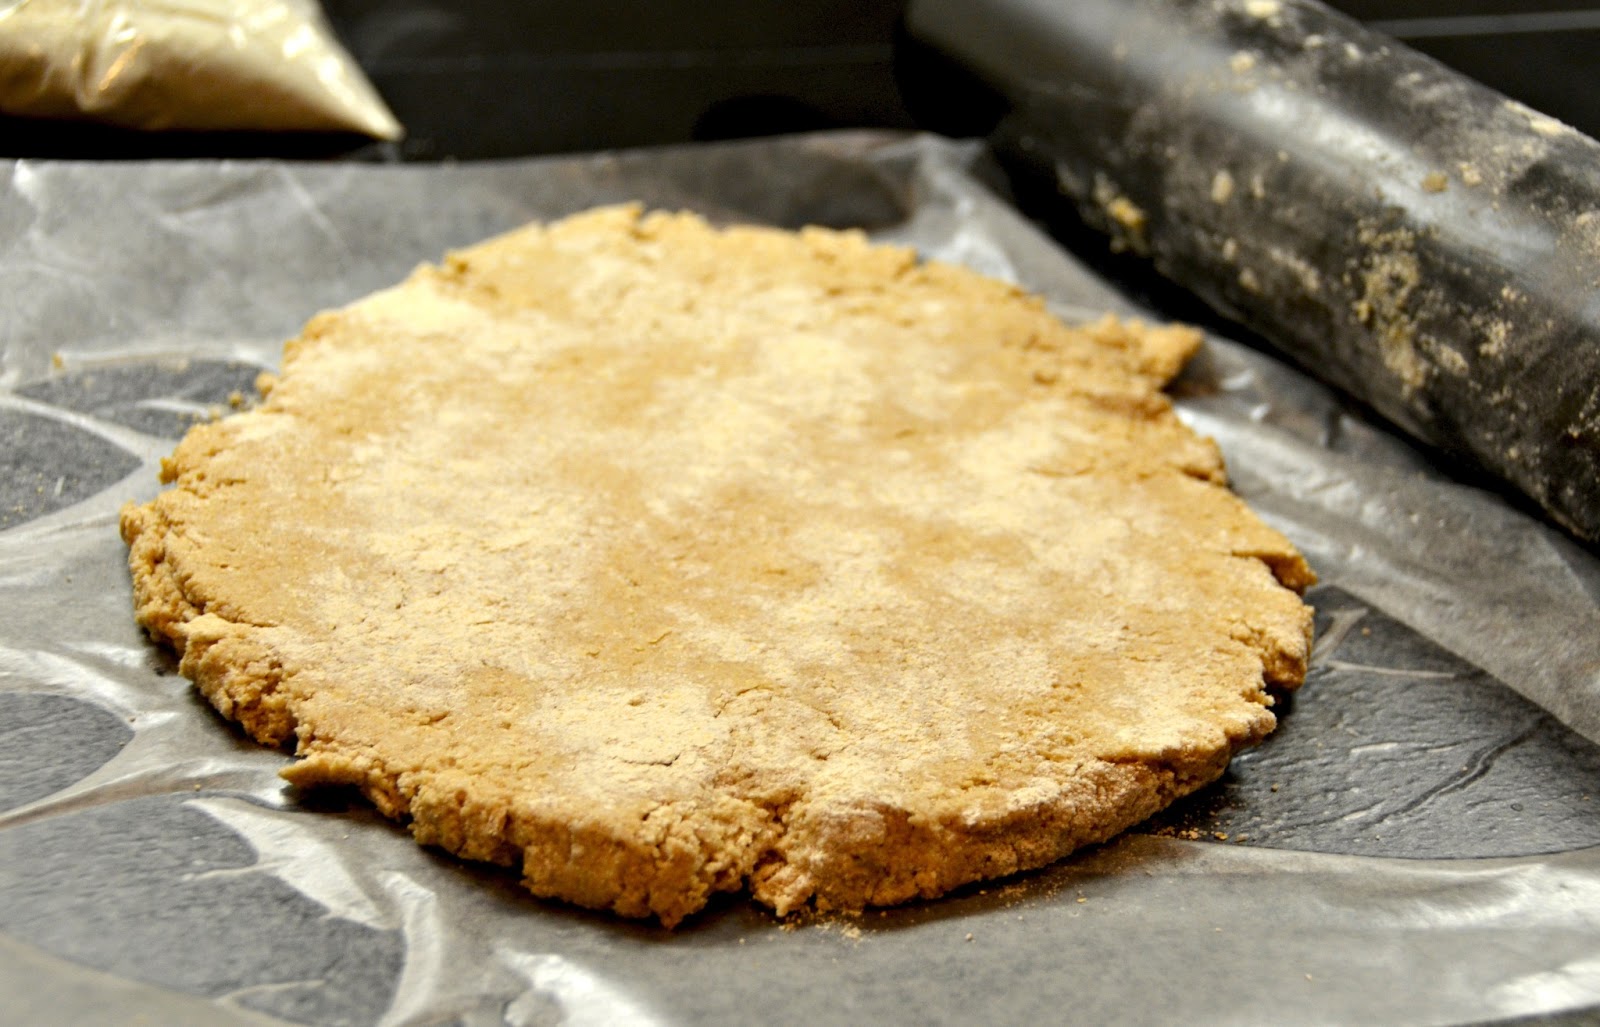
Preheat oven to 375 degrees. Mix ingredients and roll out to about a 1/2 inch thickness. I like to roll them out on wax paper that I wet on one side to keep it from sliding on the counter, then sprinkle some whole wheat flour down and some on the top to keep it from sticking to the paper or your rolling pin. Cut out with a round biscuit cutter or upside down water glass. Place each of them on a piece of parchment that has been cut to fit - about 4 pieces on a cookie sheet. 


You can see below that 4 pieces of this parchment paper will fit on the cookie sheet to bake.  Sprinkle a bit more whole wheat flour on top of the biscuit and let your little ones roll them out further to make them pretty thin - don't worry, they puff back up when you bake them. 


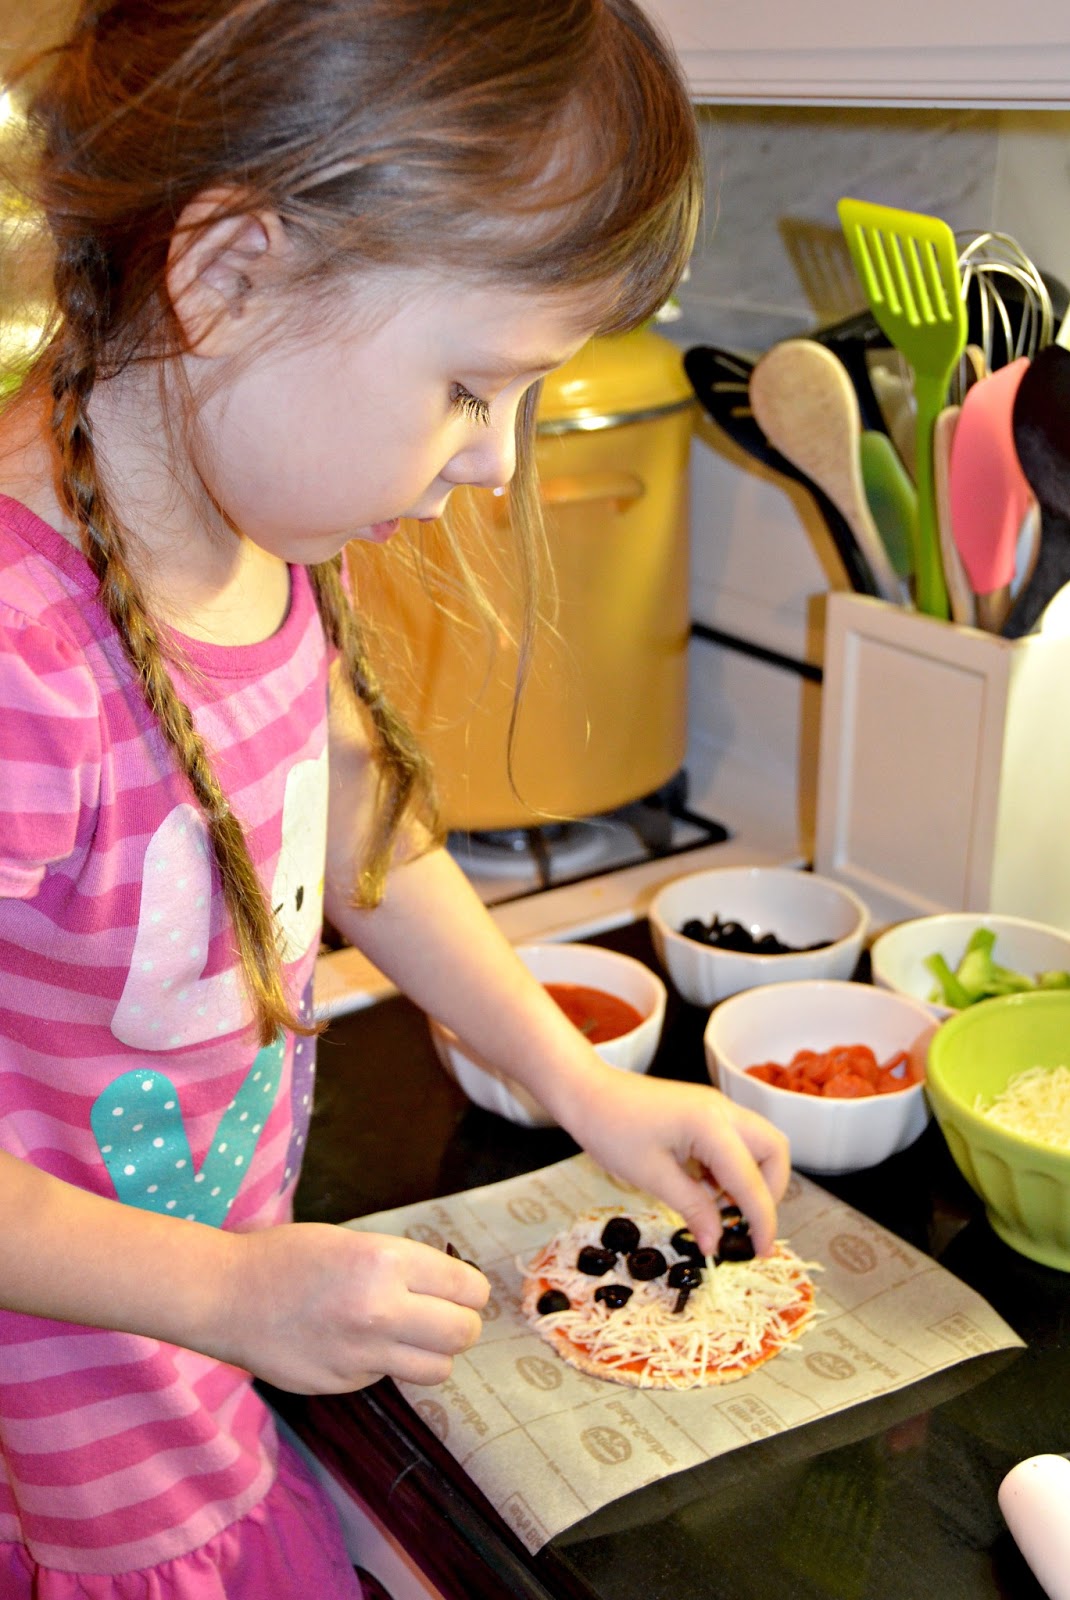
Next, let them spread on some pizza sauce (I found mine right in the grocery store and I could pronounce every ingredient and it had no added sugar) and top with their favorite toppings.  I think this is every one's favorite part, including mine.  Some suggestions include: mozzarella, shredded zucchini, diced peppers, olives, mushrooms, pepperoni, parmesan, etc.  My favorite is little dollops of ricotta cheese!


Now you can transfer each pizza to a cookie sheet while still on the parchment and not ruin their masterpiece.  Bake in the oven for 10 to 15 minutes. 


My kids loved making their own pizzas and I love that they like to be involved with their food.  I will admit that adults will want at least 2 of these, but one is fine for younger kids.  You should be able to get about 8 biscuits from the recipe anyway, so plan on about 8 mini pizzas.  Happy pizza night!


Wednesday, February 20, 2013

Banana Chocolate Chip Donuts


You all know by now that my biggest processed food no-nos are white flour and sugar.  They are just bad news and not worth my health.  So, I've been experimenting with different kinds of flours for a while.  I like whole wheat for sure, but one of my new favorites is spelt flour.  It is a cereal grain in the wheat family so it does have gluten, but most people with a mild wheat allergy can still tolerate it.  It also contains protein, vitamins, minerals, and fiber.  This is light years away from processed white flour.  And as far as sugar is concerned, there are great alternatives out there that are processed free and even nutritious.

I came across a banana chocolate chip donut recipe on pinterest (original here) and knew I could make a few swaps and have a real crowd pleaser for my family.  Plus, these are baked, so no need to get out the frying pan and oil.  I bought a donut pan several years ago and love baking practically anything into a donut (if it has that shape - it's a donut to my kids) and this was a great way to use up those ripe bananas.  

1 cup mashed ripe bananas (about 2)
1/2 cup sucanat (read more about it here)
1/2 cup plain Greek yogurt
1/4 cup melted butter
2 eggs
1 tsp. vanilla
2 cups white spelt flour
1 tsp. baking powder
1/2 tsp. baking soda
3/4 cup dark chocolate chips (or cut up a dark chocolate bar into small chunks)

Preheat the oven to 325 degrees.  In a large bowl, put the banana, sucanat, and yogurt and mix with an electric mixer until incorporated.  Add the butter, eggs, vanilla and mix again.  Then add the flour baking powder, and baking soda.  Mix until just incorporated - don't over mix.  Fold in the chocolate chips.  

Scoop the batter into a large zip-top bag and seal it shut.  Snip off one of the corners (large enough that the chocolate chips can come through) and pipe it into a greased donut pan about 3/4 of the way full.  I used my misto with coconut oil for the greasing - if you don't know what that is, read about it here.  Bake for 12 to 15 minutes and turn out onto a wire rack to cool. 


After a few minutes they are ready to eat!  They taste great as is, but if you want to add more of a donut flare, brush on some melted butter to the tops and dip them in a mixture of cinnamon and coconut/palm sugar or make a healthy, refined sugar free glaze or chocolate sauce (all of which are on my blog too.)  I have to say, we like them as is - no need for extras, but if they appeal with toppings, go for it.  They also freeze well and are easy to pull out one at a time and heat up for 30 seconds in the microwave - how's that for donuts in a hurry!  This will make about 16 to 18 donuts.  Yum!!

 
Update: I just recently got a mini donut maker and I have been cranking out these little baby donuts like no body's business!  Aren't they adorable.  You pipe them into the bottom of the hot donut maker, close the lid for a minute and they are done!  These are so easy to pop in your mouth and they freeze really well.  My kids absolutely love them!