Thursday, September 27, 2012

Ricotta Toast


I'm about to share one of my favorite breakfast treats with you.  My mom and I started making this years ago with leftover ricotta cheese.  We call it "ricotta toast" and it is super easy, quick, and processed free.  Did I mention delicious... I should have!  I LOVE ricotta cheese and we used it a lot when I was growing up because of my Italian mama.  In fact, my favorite cake has ricotta cheese as a filling.  I'll share it sometime.  So, this to me feels more like a treat than just any old breakfast.... sorry cereal, you just don't compare.  Here's what you need:

bread (Ezekiel brand sprouted or a whole wheat, no sugar version)
whole milk ricotta cheese
all fruit preserves (no added sugar or artificial sweeteners)

Toast the bread and then pile on the ricotta and top with jam.  Couldn't be simpler.  In the picture, I used strawberry, but I absolutely love this with boysenberry!  It's also fantastic with orange marmalade or a processed free lemon curd (harder to find or you can make your own.)  This can get really fancy if you use a slice of whole wheat baguette as the toast!  Serve it like that to a house guest and they'll think they are at a little cafe somewhere in Europe.

Wednesday, September 26, 2012

Healthy Strawberry Shortcake


We are still getting 90 degree + temperatures here, so I consider this time of year still summer.  And nothing seems better that a refreshing berry dessert on a hot day.  I don't believe you should give up desserts if you are processed free, so here is my healthier (and every bit as tasty) strawberry shortcake.

2 1/3 cup whole wheat baking mix
2/3 cup milk
3 Tbsp butter - room temperature or melted
3 Tbsp sucanat or whole organic cane sugar (if you can't find this, use coconut sugar)

Preheat the oven to 425 degrees.  Combine the ingredients and drop 6 heaping spoonfuls on an ungreased cookie sheet - although, I still use my silpat.  Bake for 10 to 12 minutes.  Makes 6.

You could also make these smaller and bake for less time to have mini shortcakes, which would be adorable!

I like the traditional strawberries with whipped cream as the filling, but you could use any berry medley that you wanted.  But, here is my secret for making your berries taste really flavorful and bright -cut up the berries ahead of time and let them marry with a little lemon zest.  No juice, just the zest - it really makes the berries sing!

As for the whipped cream, you can do one of two options.  At health food stores, you can find a rice whipped topping that comes in a squeeze top can just like the other whipped creams.  It's not bad, and when it's with all the other ingredients, you don't realize anything is different from before.  This is actually what I used in the picture above.  The second option is to make your own with real ingredients.  So, you would use whipping cream (preferably organic) and a sweetener, such as coconut sugar, sucanat, eryithritol or stevia.  Beat the cream first and when it starts to thicken, slowly add the sweetener of your choice.  Nothing quite like the real deal - it's always my first choice!

Maple and "Brown Sugar" Oatmeal


My kids really loved the packaged oatmeal that came in the maple and brown sugar flavor.  But, of course we are trying to be processed free, so those little packets are out.  Plus, this is such an easy flavor to recreate that there really was no need for me to lament this product.  Here is my version of this breakfast hit.

Old Fashioned Oats
Pure Maple Syrup
Coconut (Palm) Sugar

Prepare the oatmeal according to the packaged directions.  I personally like to use milk more that water because it comes out creamier, but water works fine.  Then add as much syrup and coconut sugar as you or your kids would like.  Easy, right?  And so much healthier!

Tuesday, September 25, 2012

Smarter Snacks


Fast and easy snack options can be difficult with children, especially when you have to throw something in your bag for them quickly while on the go.  Doing this with processed free food can be a bit more of a challenge which is why I thought I would share some of my favorite items and products that make this fast and easy for me.


Of course, fresh fruit is probably the best option.  Particularly items like apples and bananas that don't have to be cut up when in a hurry.  The only problem I have had is that occasionally I forget that I threw them in my bag, and a few days later they have made a mess - oops!  I have also found fruit cups that do not add any sugar or preservatives, like unsweetened applesauce and Mandarin oranges.  You can buy this kind at health food stores, but I am starting to see some of that at the regular grocery store too. 


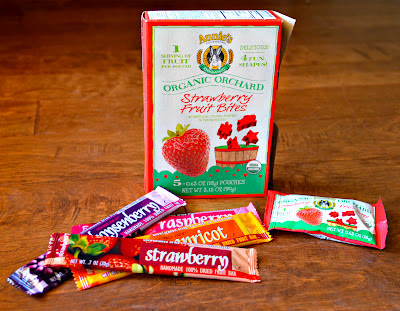
Oh the beloved fruit snacks!  I knew I needed to find acceptable replacements for these highly processed items to keep my kids happy.  And they are so darn handy to throw in a diaper bag!  Here are two of my favorites that I have deemed worthy: Trader Joe's unsweetened dried fruit bars (no added sugar) and Annie's Organic Orchard Strawberry Fruit Bites (no added sugar, colors or preservatives).  Annie's makes other kinds, but this is the only one with the ingredient label that I like.   


Here are a few more crowd pleasers when it comes to my kids, that are also fast for me.  Ak-mak crackers are a great alternative to traditional crackers loaded with trans fats.  These are whole wheat with a sprinkle of sesame seeds on them.  I thought my kids my balk at the sesame seeds, but they love them, and so do I.  And what kid doesn't like string cheese?  I just switched to buying organic - it was that simple.  You may be wondering what's in the bowl.  It's unsweetened puffed wheat.  I know this doesn't sound like something kids would like, but mine love it!  I pour some in a sandwich bag for each of them, and they happily eat this while sitting quietly when we're out.  They also like it in a bowl as a snack at home.  Easy!!  I also have found more natural graham crackers that I like, because the regular kind are also loaded with trans fats.  I just didn't have any on hand when I took this picture.  


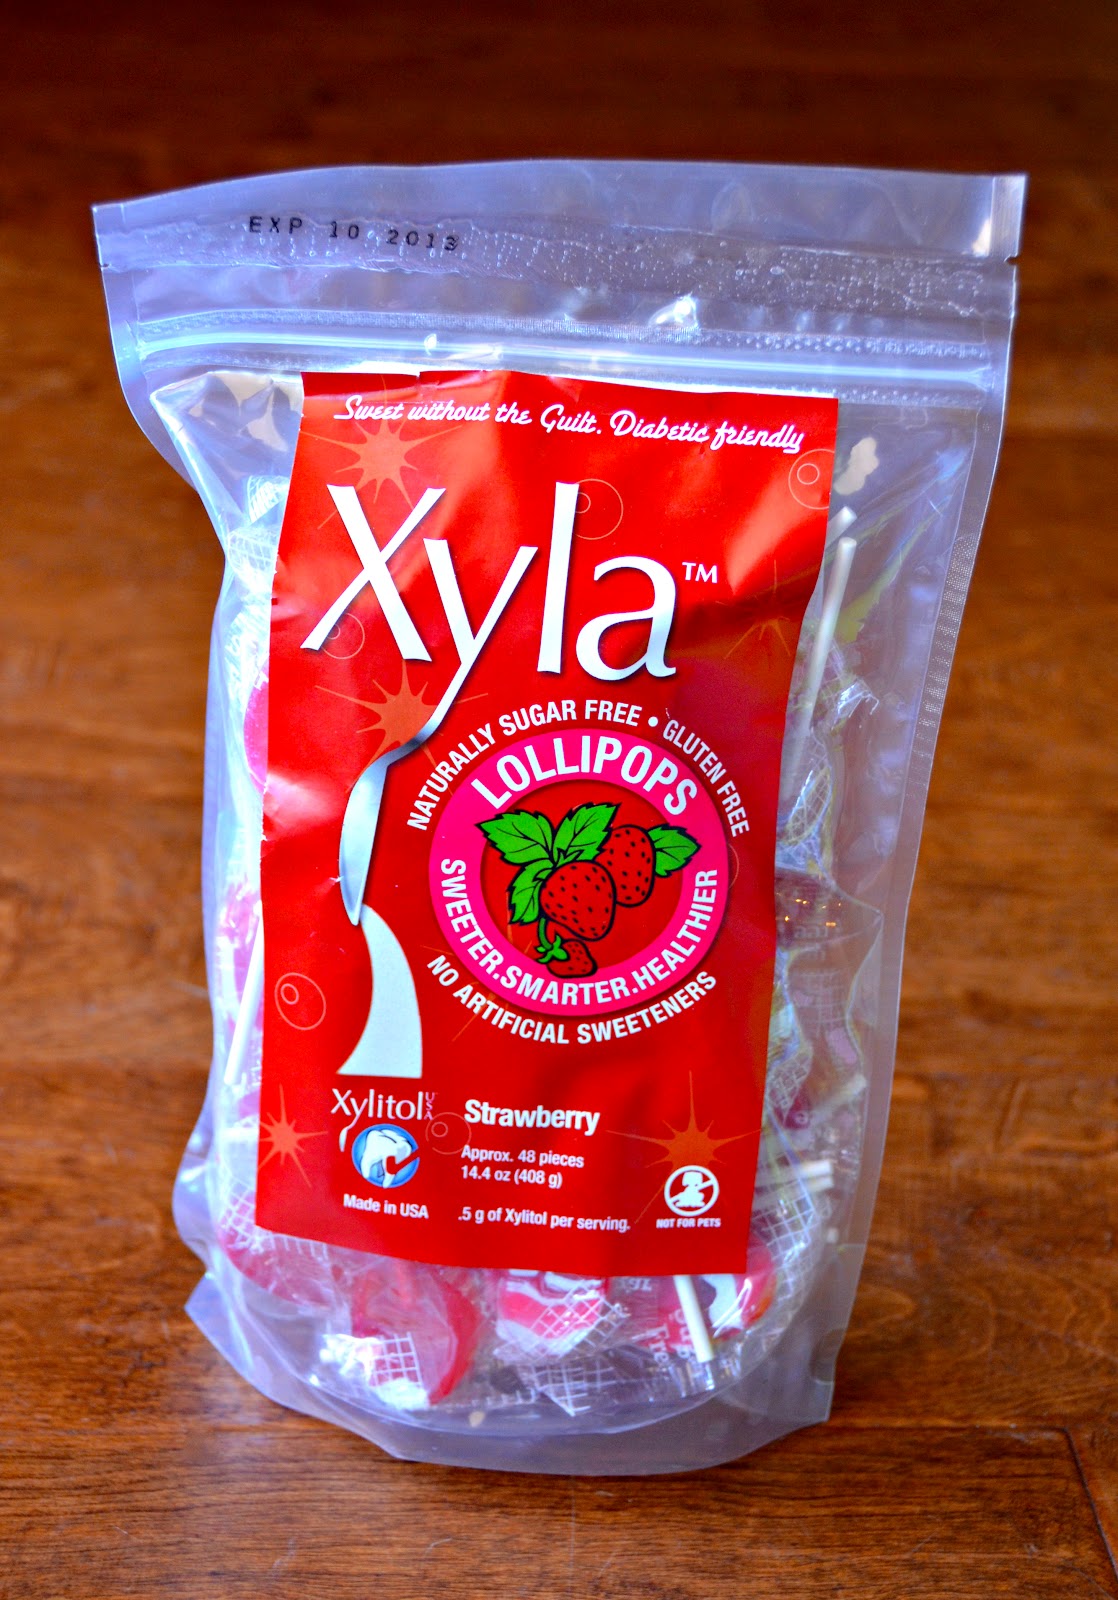
And last, but not least, a treat that keeps the kids happy and quiet while out - "candy."  I used to carry dum-dums suckers, but of course they are artificial and full of sugar.  Here is the perfect swap - Xyla Lollipos!  They are sugar free because they use the sweetener xylitol. Xylitol is known as a "sugar alcohol" (even though it is neither) and is considered natural because our bodies actually produces it on it's own.  It also occurs naturally in the fibers of many fruits and vegetables.  It's low in calories and low-glycemic because it's not fully absorbed into the blood steam.  Plus, it does not contribute to tooth decay, in fact, it actually prevents it!  So, in my mind this is a great alternative.  I would caution, that too much xylitol can cause digestive upset, so use these sparingly.  And they are expensive, so that will also cut down your desire to gobble these up to quickly or give them out too often.  Never the less, a great alternative!

Friday, September 21, 2012

Cinnamon and Coconut Sugar


This is another quick and easy convenience food that I mix up to have on hand all the time.  It's just coconut sugar with cinnamon mixed together and stored in a container in my kitchen cupboard for easy access.  I put this on toast, oatmeal, homemade cinnamon rolls, etc.  Use it where ever you like this delicious combo.  Hows that for processed free, delicious, healthy, and fast!

Cinnamon "Sugar" Toast


This is not really a processed free "recipe," but it is a fast and easy, allowable, kid friendly, breakfast or snack for my kids.  I always appreciate simple ideas for processed free living that don't take too much time.

To make this processed free, take a slice of Ezekiel bread (or homemade bread), toast it up and spread butter on top.  Use organic butter if you can find it.  Then sprinkle on some homemade cinnamon and coconut sugar mixture and you're done.  I serve this with some fresh fruit or a green smoothie for a yummy breakfast my kids ask for, and I don't feel guilty giving to them!

Coconut Sugar (Palm Sugar)


This has become one of my favorite sweeteners!  I can grab it and add it quickly to anything that needs a quick sprinkle of "sugar."  It's organic, raw, and low glycemic, so it's perfect for using in recipes!  It is brown in color and has a slightly brown sugar kind of taste.  This is one of my favorite brands, but you can find others or buy it in the bulk section of major health food stores.  It has become an absolute staple at our house!

My Favorite Bread


This is my favorite bread to buy at the store.  Being processed free, you might think I would have to make all my bread from scratch - not true!  This Ezekiel bread is whole grain, organic, and flourless because the grains are sprouted, not ground.  Plus, it has more nutrition and no preservative chemicals.  You can buy it at health food stores in the refrigerator or freezer section, but I even found it at my local grocery store in their natural foods corner!  It does cost a little more and for best shelf life, it's recommended to keep it in the refrigerator, but it is well worth those small changes for all the health benefits. Use it for anything you would traditionally use bread for: sandwiches, toast, french toast, bread crumbs, homemade croutons, etc.

It's hands down one of my favorite products and a total time saver as a mom!

Thursday, September 20, 2012

Pigs in Blankets


My kids love these bite sized comfort food.  I started making these a few years ago with a simple recipe from Hungry Girl.  But when I decided to change our eating habits and concentrate on eating processed free, I knew these little cuties would have to go.  At least how I was making them before.  I knew this would not go over well with the kids (or my husband) to remove these from our diets permanently.  If I made a few swaps, I could actually feel okay with making them again.  Here is my new version of these cuties.  Also good for parties!

Pigs in Blankets


One package of nitrate/nitrite free hot dogs (don't use regular!) - about 8
1 recipe for 100% Whole Wheat Crescent Rolls

Start with making the crescent roll dough.  It will take time to let the dough rise for an hour, but you can skip the second rise time.  Cut each hot dog into 4 equal pieces.  If your package had 8 to start, you will wind up with 32 hot dog pieces.  After the dough has risen for an hour, divide it in half and roll out one of them to a 12" circle - skip the step for the crescents roll recipe to put oil or butter on the dough.  Now cut the circle into 16 equal wedges.  Roll each hot dog piece in a wedge starting at the outside edge and moving towards the tip.  Place them on a greased cookie sheet and put them in the oven for 12 minutes at 375 degrees.

Here is what they look like just rolled before going into the oven.


And here they are will a dollop of ketchup.  I use a low or no sugar variety with no high fructose corn syrup or I make my own.  They are also good with mustard which always brings out the German in me.  Ja wohl!


Wednesday, September 19, 2012

100% Whole Wheat Crescent Rolls


When trying to eat processed free, you realize there are recipes that you used to make that your family liked, but can't enjoy anymore.  Crescent rolls were one of those for me.  I love bread! Only I couldn't justify all the negatives about this favorite food.  After a little trial and error, I came up with this recipe that uses real ingredients, healthy oils, and cuts out the refined sugar and flour.  Now there is no stopping the enjoyment!

Whole Wheat Crescent Rolls


3/4 cup warm milk
1 package of yeast
2 cups whole wheat flour
1/2 tsp. salt
1 tsp. honey
1 Tbsp coconut oil + more for brushing on the bowl and dough (heated slightly to become liquid)
1 egg, beaten, at room temperature


Dissolve yeast into warm milk.  Allow to sit for about five minutes.  In a large bowl combine milk and yeast mixture, 1 cup of flour, salt, honey, 1 Tbsp oil, and egg.  Mix well.  Add enough of the remaining flour to make the dough easy to handle (about 1 cup.)  Turn onto a floured surface and knead for a few minutes – it should feel smooth and springy.  Grease the bowl with coconut oil and put the dough back in the bowl.  Cover with a kitchen towel or plastic wrap and allow to rise in a warm place for one hour or until dough has doubled in size.
Punch down the dough to deflate it and divide it into two equal halves.  Place half on a floured surface and roll out into a 12“ circle.  Brush each piece with a bit more coconut oil or butter if you prefer.  Cut into 8 equally sized wedges. Roll each one starting at the outside edge to the point of the triangle.  Place on a greased baking sheet.  You can brush with more butter if you would like.  Cover them loosely again and let rise 30 more minutes or until doubled.  Repeat these steps for the other half of the dough.  Bake at 375 degrees for 12 - 15 minutes.

 Makes 16 rolls 

Monday, September 17, 2012

Beef Stew and Dumplings

Beef stew and dumplings are a long time family favorite.  I remember my Italian mama making this quite often because we all asked for it constantly.  This is a recipe that says home and love.  There was nothing really wrong with the beef stew in terms of being processed free (only a bit of flour at the end to thicken the stew), but the dumplings sure needed an overhaul.  So here is my cleaned up version of my mom's classic stew and dumplings.

Beef Stew

2 -3 lbs. stew meat (preferably grass-fed, organic)
3 medium russet potatoes
1/2 - 1 lbs. baby carrots
1 onion
1 1/2 - 2 Tbsp salt
2 tsp black pepper
1/2 tsp nutmeg
2 Tbsp coconut oil

Cut the meat into bite-sized pieces remembering that the meat will shrink slightly as it cooks.  Brown the meat in the oil on high heat in a large cooking pot.  Add 8 cups of water and bring to a boil.  Turn the heat to low-medium so that it barely boils.  Skim off the foam.  Add the salt, pepper, and nutmeg.  Put the lid on the pot slightly offset and cook the meat for about 1 1/2 hours.  While the meat is cooking, cut the potatoes into bite-sized pieces and dice the onion. (I like the skin left on the potatoes - it feels more rustic and adds nutrition, but you can peel them if you want)  Cover the vegetables with cold water and set aside until you are ready to add them to the meat.  After the meat has cooked, add the vegetables and cook until tender.  If you add the vegetables and they aren't covered in the broth, just add a bit more water.  Check the seasoning and adjust as needed.  In a separate bowl mix 2/3 cup water with 6 Tbsp. rice flour or whole wheat flour.  Mix and add to the stew to thicken the broth.  Now you are ready to add the dumplings on top.

Dumplings

2 cups whole wheat baking mix (found on my blog)
2/3 cup milk

Mix and drop by heaping spoonful on the stew.  Reduce the heat and cook uncovered for 10 minutes.  Cover and cook an additional 10 minutes.  You know they are done with the tops are no longer glossy and they spring back when you touch them.

If I'm being honest, we always mix up a double batch of dumplings.  I highly recommend it!  The following picture shows just one batch.  Enjoy!


Whole Wheat Baking Mix


Sometimes you just feel like comfort food.  But, then you realize that your old comfort food was loaded with refined sugar, refined flour and trans fats.  There's only one thing left to do... remake it!  Here is my version of "Bisquick."  I wanted this to be as close to the original in taste, but with real ingredients, aka processed free.

Whole Wheat Baking Mix


4 cups whole wheat flour or whole wheat pastry flour (sprouted is best if you can find it)
2 1/2 Tbsp baking powder
1/2 Tbsp sea salt
3/4 cup powdered milk
1/2 cup butter (cold and in small pieces)

The easiest, quickest, and best way to mix this is in a food processor.  Just pour everything in and hit pulse until the butter has disappeared.  It's super fast and creates the perfect texture.  If you don't have a food processor, don't worry, you can mix it by hand.  Pour everything together in a large bowl and use a pastry cutter to smashing the the lumps of butter until they are completely gone.  It takes a few minutes, but this will happen.  And you're done!

This makes about 5 1/2 cups of baking mix.  Store it in an airtight container in the refrigerator or keep it in the freezer (like I do) to always have it on hand.  Use it the same way you use any all purpose baking mix.  Look for more posts on how I use this baking mix in lots of different ways!