Showing posts with label homemade version. Show all posts

Tuesday, January 3, 2017

Potato Salad


I know everyone thinks their mom's potato salad is the best, and I guess I'm no exception.  Our whole family swears by this simple, yet delicious version with no fills or fuss.  To me, this will always be the way potato salad should be - thanks Mama!  

4 lb. bag red potatoes
1 dozen eggs
3/4 of a 15 oz. jar of mayonnaise (I like safflower mayo or Veganaise)
salt and pepper

First, hard boil the eggs.  In a medium pot, place the eggs and cover with cold water.  Bring to a boil, then turn off the stove and cover for 12 to 13 minutes.  Pour out the warm water and run the eggs under cold water.  Peel and chop.  Set aside.  Dice the potatoes (you can peel them first, but it's more nutritious to leave the peel on) and put them in a large pot.  Cover with water and add salt - potatoes need salt!  You'll also be able to add more later if you need to.  Cook until tender.  Drain in a colander and run cold water over the top.  Stir the eggs, potatoes and mayo together with salt and pepper to taste.  The egg yolks will mix with the mayo and make the most delicious, creamy sauce.  Check for seasonings (especially if it needs more salt) and you're ready to serve!


Friday, January 29, 2016

Chocolate Avocado Frosting


I feel like I'm cheating with this recipe a little bit because it's the same recipe as my chocolate pudding and fudgesicles.  My justification is that when you find a really versatile, processed free, delicious recipe, you just run with it! This is a creamy, rich frosting with no refined sugar or unhealthy oils.  Those have been replace with raw honey and avocados.  I understand this might not be for everyone, but even my sister who doesn't like avocados likes this recipe.

2 avodados
1/2 cup cocoa powder
1 tsp. vanilla extract
1/4 cup raw honey
1/8 tsp. salt

Put everything in a small food processor and turn it on until all the ingredients are mixed and creamy.  This makes enough to cover the top of a 9x13 inch cake.  You can double it to make a thicker layer or enough to put between layers as well.  This is best spread on the cake and refrigerated to firm it up before cutting, but you don't have to.  Store leftover frosting and/or frosted cake in the refrigerator.

Thursday, January 21, 2016

Clean Rice Crispy Treats


My kids love rice crispy treats.  I never make them with the traditional ingredients that are very processed and full of sugar.  Instead, I make this recipe.  It is loosely based on the one by Alicia Silverstone with just a few changes to fit my tastes and guidelines.  I think the addition of the peanut butter flavor is really delicious!

3/4 cup brown rice syrup
small pinch of sea salt
1/4 cup natural peanut butter, almond butter, cashew butter or sunflower seed butter
1/2 tsp. vanilla extract
3 cups whole grain brown rice cereal (no sugar added)
(optional: 1/4 cup dark chocolate chips)
coconut oil for greasing the pan

In a small sauce pan, heat the brown rice syrup and salt - you don't need to bring this to a boil.  Once it's smooth, add the peanut butter and let both completely heat through.  


Turn off the heat and stir in the vanilla.  Pour this over the brown rice cereal and coat everything.  If you want to add the chocolate chips, add them now.


Grease an 8x8 pan with coconut oil and pour in the mixture.  Let this completely cool before cutting into squares - about an hour.  Putting it in the refrigerator will speed up the time!  I hope you like these as much as we do!


Thursday, September 10, 2015

Cauliflower Pizza Crust


We have all been trying to go grain-free because of my husband and add more vegetables to our meals at our house.  I had really been wanting to try a cauliflower pizza and this gave me the perfect opportunity.  After doing a little research and tweaking this to my own preferences, our recipe for cauliflower crust pizza was born.  This has many steps, but all of them are easy - in other words, this is not fast, but it is simple.  It's also surprisingly filling - must be all the veggies.  My favorite thing is that it is processed free.  Let pizza night begin!

Makes 2 medium pizza crusts

1 large head of cauliflower
2 eggs (beaten)
1 cup shredded mozzarella
1 tsp. fine sea salt
1 tsp. Italian seasoning
1/4 tsp. black pepper

Toppings of your choice: sugar free pizza sauce, cheese, shredded zucchini, olives, bell peppers, mushrooms, pepperoni, ricotta cheese, etc.

Preheat oven to 450 degrees.  Line a baking sheet with parchment paper and liberally grease it with olive oil.  Chop the cauliflower into small pieces and pulse until finely chopped in a food processor - not pureed though.  Pour into a microwave safe bowl and heat for 8 minutes then let it cool enough to handle. 


Put small batches into a tea towel and twist to remove as much moisture as you can - it has to be dry!  You may have to do this in several batches like I did.


Transfer to a bowl and add the other ingredients.  Shape into two crusts on the oiled parchment and bake for 15 to 17 minutes. 


Should be slightly golden.  Cool a little and add your toppings.  Bake again for 10 to 15 minutes or until the cheese has melted and started to bubble.


Feel free to experiment with your own seasoning and toppings.  I also think this is easier eaten with a fork rather than picked up like a traditional pizza slice.  Give this a try - you may find you like eating more veggies! 

Thursday, August 27, 2015

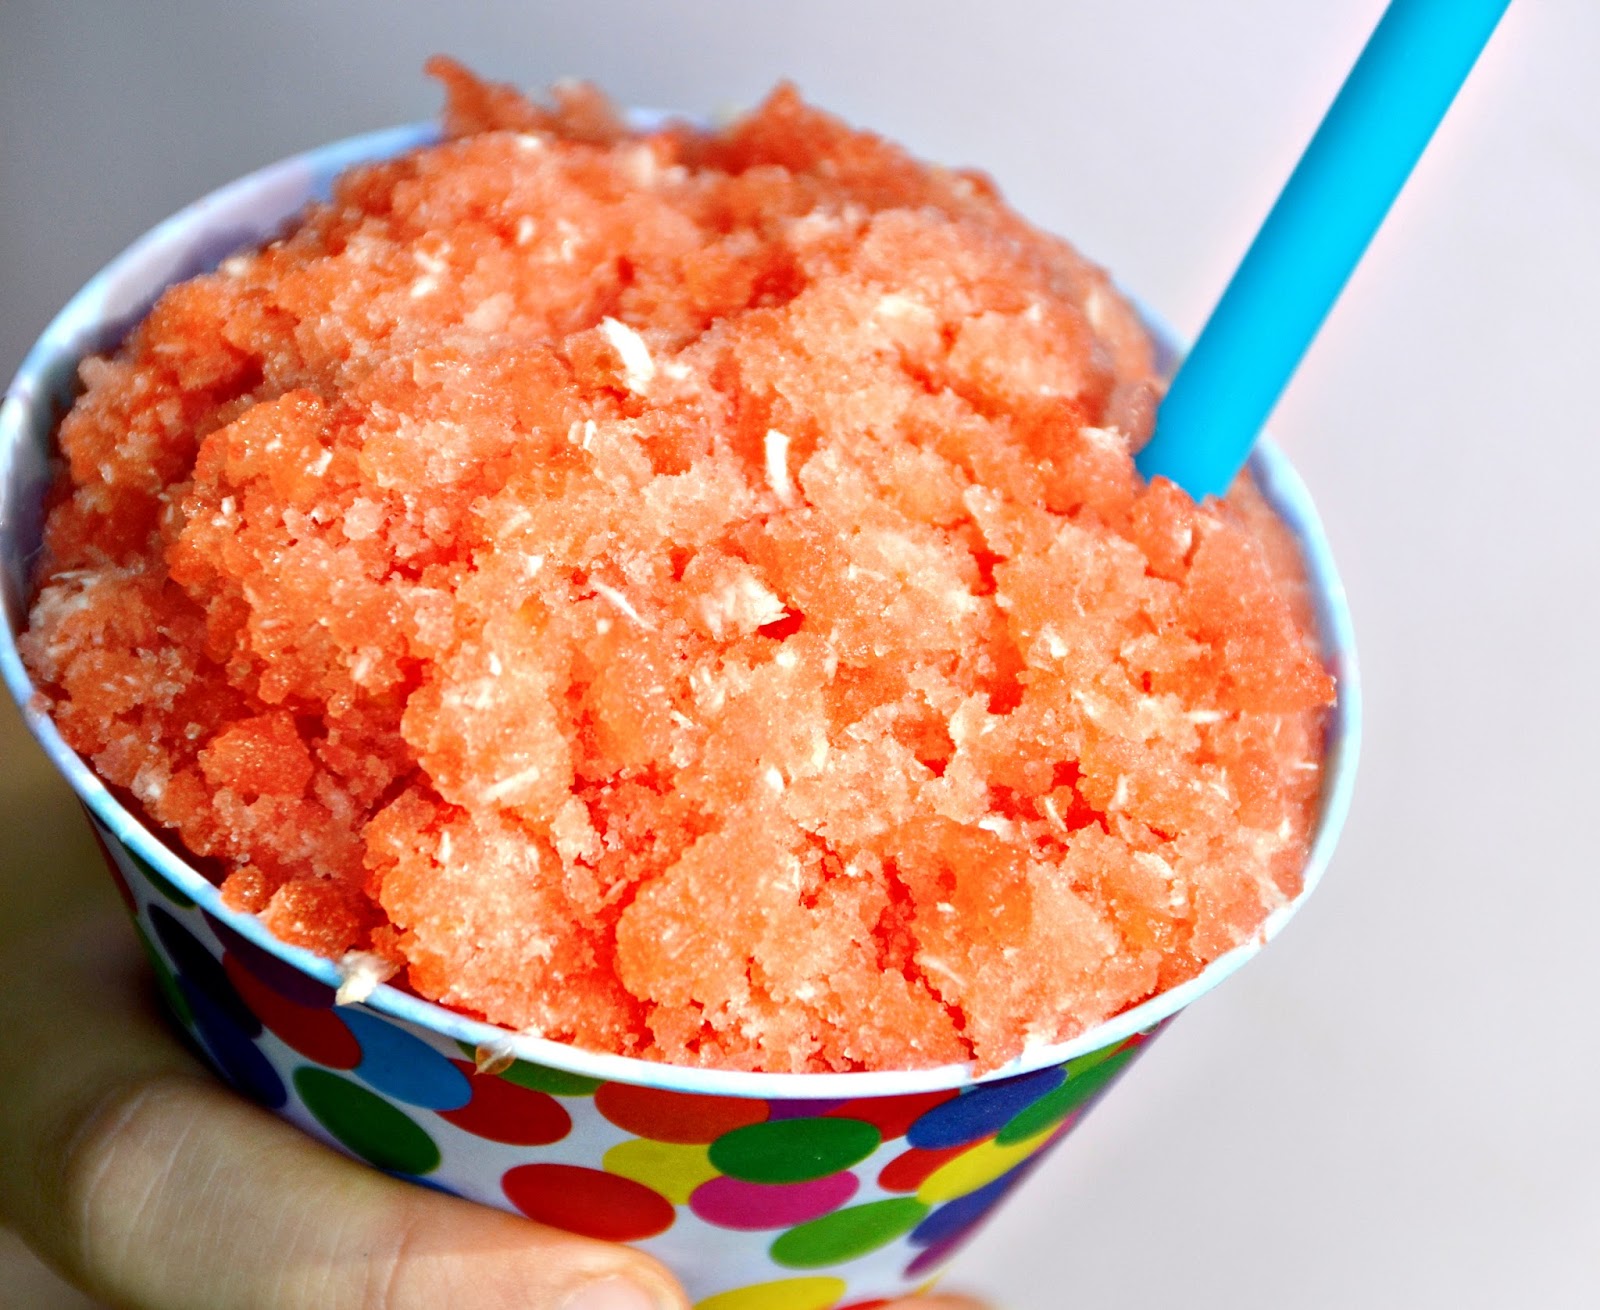
Watermelon Lime and Coconut Snow Cones

 
My friend Lenor, who is an amazingly creative cook, made a coconut watermelon smoothie for me out of frozen watermelon and coconut flavored syrup.  It was so delicious, but I wanted to come up with a sugar-less version for my family that didn't use coconut syrup since it is full of refined white sugar.  Not exactly processed free!  I also wanted to introduce one more flavor - lime.  Have you ever heard of people eating watermelon with a sprinkle of salt?  It may sound odd, but it does tend to add a nice flavor enhancement.  Lime can often take the place of salt in a recipe and add tremendous depth of flavor, as well as a freshness you just can't beat from citrus.  So this was my thinking in adding the lime.  The result was something absolutely wonderful, sweet, and completely processed free.  My kids gobble this up as if  they were being given the most delicious treat in the world. 
 
juice of one lime
1/4 tsp. coconut extract
3-4 drops liquid stevia
2 Tbsp. finely shredded unsweetened coconut
3 1/2 cups frozen watermelon chunks


Cut fresh watermelon into 1 inch squares and freeze in a zip top bag.  This will take hours, if not over night to freeze completely.  Once frozen, you are ready to make the snow cone.  Juice one lime and add the coconut extract and stevia to the juice and stir.  Pour this into the blender or food processor.  Add the shredded coconut and frozen watermelon.  Puree this until it all comes together.  You will have to stop the machine, scrape down the sides, and stir it together a few times.  Once the watermelon is not in chunks anymore and it's all the right consistency, give it one more stir to make sure all the flavors are incorporated evenly before serving.  You will see white bits of coconut throughout the snow cone. 

Another great thing about this recipe is that it doesn't melt as fast or in the same way as a regular snow cone made of water and syrup.  Because the base is watermelon, it stays together quite well - even to the last bite!  And the kids do not get as sticky with sugary syrup since there is none, not to mention stained by artificial food coloring.  I hope you enjoy this as much as our family.  This has become one of our favorite summer treats - with no refined sugar!


Saturday, May 2, 2015

2 Ingredient Peanut Sauce


This peanut sauce is ridiculously easy - I mean, my two year old can make this!  Technically it's more than two ingredients, but you only need to add two things to the bowl.  I love that this is processed free, but not taste free and super healthy.  Anyone want peanut sauce last minute?  Coming right up!

Organic Natural Creamy Peanut Butter (just peanuts and salt)
Braggs Ginger and Sesame Salad Dressing

Combine equal parts of both peanut butter and salad dressing.  Stir to combine - that's it! 

You can heat this up if you want it warm or serve it cold.  If you want some texture, you could use chunky peanut butter or add some chopped peanuts after you make it.  If you prefer more peanut taste, add more and visa versa for the ginger sesame dressing.  Serve this with whatever you like.  Here are a few ideas - lettuce wraps, chicken satay, pasta, stir fry, baste salmon etc.  Have fun trying this on whatever sounds good!

Saturday, January 31, 2015

Easy Almond Milk


Occasionally, I like to make a recipe that calls for almond milk, such as a smoothie.  If I don't have any on hand, this is what I like to do instead.  I like this because it's easy and allows me to keep the integrity of the recipe intact.  Staying processed free is important to me and there are also times when you wouldn't want to use regular milk.  For example, if you are mixing it with cocoa powder, regular milk interferes with the antioxidants, so using a different milk is preferable.  If you're in a pinch, try this!

1 cup water
1-2 Tbsp. raw almond butter

In a blender, combine these until smooth.  If you're using this in a smoothie or something that would otherwise be blended anyway, just add them to the bender with everything else you're using anyway.  Hope this makes life easier when you run out of almond milk! 

Thursday, January 15, 2015

Zuppa Toscana


I think it's because of the winter chill and snow, but warm soup just seems perfect right now.  I love that it feels like it's thawing  you from the inside out.  This soup has always been one of my favorites.  I love the hearty chunks, creamy soup base, and fresh kale!  I did my homework and worked out how to make this as simple as possible and processed free.  Now, it's my new favorite soup!

1 lb. Italian sausage
1/2 to 1 tsp. red pepper flakes (to your tastes)
4 slices of bacon, chopped
1 large onion, diced or pureed
3 garlic cloves, minced
2 boxes (32 oz.) chicken broth
2 cups water
3 large russet potatoes, unpeeled and cut into small chunks
1 1/2 cups heavy whipping cream
liberal sprinkling of white pepper
1/2 tsp. or more of salt
3 cups of chopped kale

In a large pot, sauté the Italian sausage and crushed red pepper.  Remove and set aside.  If your bacon is uncooked, add it to the pot then add the onions and garlic, If your bacon is already cooked, add the onions and garlic first and cook down, then add the bacon.  Once everything is cooked, add the chicken broth and water and bring to a boil.  Add the potatoes and cook until soft - this will take between 10 and 20 minutes depending on the size of your potatoes.  Add the heavy cream and sausage and heat through.  Add the white pepper and salt.  Check the seasoning to know if you want to add any more.  Stir in the chopped kale right before serving to keep it nice and bright green and stop it from wilting too much.

This soup is also very forgiving.  For instance, you could leave out the bacon entirely or add twice as much kale.  It will still taste great.  I think that might be my favorite thing about soups all together, almost anything works! 

Wednesday, January 14, 2015

"Refried" Beans

 
I love refried beans!  I am from the Southwest and this is one of the staples to the region.  I do not, however, like canned refried beans - never have.  They taste stale and too doctored.  Refried beans should be simple and clean in flavor.  Let the beans be the star.  My mama taught me how to make her recipe, and they couldn't be simpler!  Of course, they are processed free and you only need three ingredients.  The best part is there is no frying involved.  Put easy "refried" beans on the menu!
 
2 lbs. dried beans (pinto or pink)
water
2 Tbsp. sea salt
 
Pour the dried beans in a large pot.  Now add about 3 times as much water as the beans.  You need a lot of water because the beans will soak them up.  Bring this to a boil, then turn this down to a simmer with the lid slightly ajar for about an hour and a half.  Occasionally stir it, but don't feel like you have to babysit this at all.  After that time has passed, it should look something like this.  The beans have soaked up a lot of the water and are getting soft.  Now, stir in the salt.  You can't add the salt at the beginning or it will make the beans kind of tough. Put the lid back on, slightly ajar and let this simmer another hour to hour and a half.  
 

The beans will have soaked up even more water and been seasoned by the salt.  Turn off the heat and mash the beans.  You can use a potato masher, a blender, a food processor, whatever you have.  I like to use my immersion blender and puree them right in the pot.  If they seem too dry at any point (during cooking or blending) you can always add a little more water.  That's it!  Told you it was easy.

 
Here are a few ways to use them: make bean burritos, dip or layered dips, Mexican pizzas, tostadas, soft or hard tacos, add them to soup, use them in casseroles, etc.  These are also the perfect side dish for a Mexican feast.  I personally love to smear these on homemade Indian Fry Bread!  Another bonus is that ALL my kids like these beans - that makes this a winner of a recipe.  They also freeze really well, so don't throw our any left overs.  Whether you have a lot of dried beans lying around, want another option besides meat or just love refried beans, I hope you'll give these a try!


Thursday, November 6, 2014

30 Second Raspberry Cinnamon Jam


This "recipe" is one of those everyday, I don't think about this as a recipe, kind of foods.  This is my version of raspberry jam with the added warmth of cinnamon.  I make this all the time, especially for sprouted grain toast or bagels in the morning, but because I only make as much as I need for one time and always eye-ball the proportions, I hesitate to call it a recipe.  It's sweet, and tart with a hint of spice, and of course, processed free. Here's the idea of it:
 
a handful of fresh raspberries
a sprinkle of coconut cinnamon sugar (find it here)
 
Put the raspberries in a small bowl, shake the desired amount of coconut cinnamon sugar on top and proceed to mash and mix it all together with the back of a spoon.  This works best with raspberries as opposed to other berries because they easily separate, yet remain gelatinous like a jam or jelly.  Now you can use this however you like.  I only use about a 1/4 tsp. or less of the coconut cinnamon sugar - it truly is just a sprinkle, but add what you like.  I hope you enjoy this - we certainly do!


Tuesday, May 20, 2014

Fudgesicles


I'm posting this recipe right on the heels of my last post because the recipe is the same.  The only difference is that don't eat the chocolate avocado pudding right after you make it, you freeze it!  This makes the most decadent, creamy, rich, and satisfying fudgesicle you've ever had.  I think they are SO much better than anything you buy in the store which is full of refined sugar and processed junk.  My kids go nuts over these and love taking part in making them which I think really helps when it comes to teaching them about healthy foods.  This is a treat, but it boasts wonderfully healthy ingredients like, avocados (full of vitamins, minerals, protein, healthy fats, and fiber) and cocoa powder (the number one antioxidant food in the world.)  Let's hear it for chocolate, creamy, and delicious all being part of a healthy diet!

(Here is the link to the recipe)


Wednesday, April 2, 2014

Strawberry Lemonade Slushies

 
When we first started taking our kids to movies, we would buy lots of popcorn and frozen slushies to get them through the entire movie.  Yes, we used food as both a pacifier and a babysitter so we could enjoy the movies too.  I shudder at the thought of all the junk they consumed in one sitting.  I could never bring myself to do that again now that I've learned so much.  Movies in the theatre now include air popped popcorn made at home, and a bottle of water.  But what's even better is our movie nights at home!  We make these processed free strawberry lemonade slushies and the kids go wild.  These have the same consistencies as those red and blue frozen drinks at the theatre, but NO added sugar.  Lemons and strawberries - doesn't get too much better when this is what your kids are considering a super treat. 

Zest of one lemon (optional for more lemon flavor)
juice of 4 lemons
1 1/2 tsp. liquid stevia
1 cup water
3 cups ice
2 cups (heaping) frozen strawberries

Pour everything into a high powered blender and hold on tight!  This may take 1 to 2 minutes to completely pulverize the ice and strawberries.  I have had to play with this recipe several times to get the right proportions for what my family likes.  None of us like overly sweet lemonade, so if this is too sour, I suggest adding more strawberries rather than more stevia.  The liquid stevia is so strong that when you add too much, it seems to be all you taste.  You also might make minor adjustments if you have really juicy lemons or tiny ones.  If you don't like stevia, you could always use honey in a larger proportion, but I like the fact that stevia is 0 calories and has no effect on blood sugar.  Hope this makes for a fun movie night at your house too!


Saturday, February 22, 2014

Healthy Ranch Dressing Mix

 
We don't really eat a lot of ranch dressing around here, but it's one of those items that you just have to have some times.  I know plenty of parents who swear it is the only way to get their kids to eat veggies and sometimes you just have to have it on a salad or for a recipe to make it extra special.  That's why I wanted to play around with this refrigerator staple and make it processed free.  It took some doing, but I finally have a dressing that meets my two criteria: quick and easy, and all natural!

1/3 cup dry buttermilk
2 Tblsp. dried parsley
1 1/2 tsp. dried dill
2 tsp. garlic powder
2 tsp. onion powder
3 tsp. dried onion flakes
1 tsp. paprika
1 tsp. dried chives
1 tsp. salt

Pour all of these into a small food processor and blend into a powder.  Store in the refrigerator in an air-tight container.  It should be good for a long time - months and months!
 

When you are ready to make it, combine 1 Tbsp. mix to a 1/3 cup of sour cream (find one where the only ingredient is cream.)  This will make a nice dip consistency and you can leave it as such.  If you want to thin it out to make more of a dressing, add a little milk until you have reached the desired thinness.  My sister likes to mix it with Greek yogurt instead, but I prefer the sour cream.  I do have to say, I almost always have Greek yogurt and my family eats it no matter what! 

I also like that this makes a small amount versus other recipes that make 4 cups and you have to use it in two days!  No one should be consuming that much ranch!!  If you need to make more, you just double or triple this and there you have it.  No more mystery ingredients for my family.


Saturday, January 11, 2014

Strawberry Milk

 
My daughter has been talking about Valentine's Day ever since Christmas ended.  I like to stay ahead of the game and think up clean recipes and treats so the kids can still celebrate the upcoming fun, but not have all the sugar and processed junk that could be involved.  Here is our version of strawberry milk made processed free!  My kids love this and I don't feel guilty about this drink at all.  Plus, it's great that it's pink - perfect for Valentine's Day!
 
1/2 cup freeze dried strawberries
1 cup milk (use almond milk if you don't consume dairy)
10-15 drops liquid stevia (or to taste)
1/4 tsp. pure vanilla extract
 
Pour all the ingredients into a blender and blend until smooth.  You can pour it through a fine strainer to remove any little strawberry seeds if you want.  My kids didn't mind the seeds, but I did.  This makes one serving, but's its just as easy to double or triple the recipe.  Let the pink foods begin!


Thursday, January 9, 2014

Chocolate Covered Strawberry Yogurt


This has to be one of the easiest and most satisfying yummies you could make.  I love Greek yogurt, but when you want something sweet, it does have to be doctored a bit.  This is where all those processed free tricks come into play.  One of my heroes, Dee McCaffrey, talks in her book about how she makes vanilla yogurt by adding pure vanilla extract and stevia to plain yogurt and voila, vanilla yogurt without the added sugar!  I've been doing this for years now and let me tell you, the yogurt combinations are endless. (Get her book, The Science of Skinny - life changing!)

I was inspired by the lovely treats associated with Valentines Day and thought this would be delicious.  And oh, how I love you chocolate and strawberries!  It's simple: make your homemade Greek vanilla yogurt to your taste (start with 4-5 drops of stevia and a 1/4 tsp. vanilla and add from there,) cut up strawberries, and dark chocolate chips.  That's it.  This comes together in no time!  You can also use grain-sweetened chips or carob chips if you prefer.   The mini chips are wonderful too!


Tuesday, November 19, 2013

Clean Caramel Sauce

 
I once thought that eating processed free meant some foods would just be off limits - like caramel sauce.  It's basically melted sugar, right?  But, here is where swapping in a smart and healthy way can allow you to eat almost anything.  Let me just tell you how great this caramel sauce is.  It's smooth, rich, and tastes just as good or better than a traditional caramel.  The recipe is also fast and easy too! 
 
1 cup coconut sugar or sucanat
1/2 cup half and half
4 Tbsp. butter
pinch of salt
1 Tbsp. vanilla extract
 
Pour the coconut sugar/sucanat, half and half, butter and salt into a saucepan and heat on medium low.  Whisk for about 5 to 7 minutes until everything is combined and starts to thicken - it will be bubbly. 

Add the vanilla and cook one more minute.  Take the pan off the heat and let it cool a little.  You can use it warm or store it in an air tight container and store it in the refrigerator. 

This tastes great even cold - promise!  Now you can have caramel on anything you want.  I like it on a clean ice cream (here's mine) or one of my new favorites, salted caramel brownies.  Just make some clean brownies (here's mine), drizzle the top with the caramel sauce, and sprinkle course sea salt on top - amazing!!


Monday, April 22, 2013

The Best Baking Powder


If you look closely at the label on this baking powder, you will notice it says aluminum free.  Once I ran out of my old brand, I started purchasing only aluminium free for a couple of reasons.  One is for taste.  If you've ever experienced any of your baked goods tasting a little "tinny," this was the reason why.  So, the simple fix is to switch baking powders.  The other reason I chose to bake with this instead is that there are some possible health risks due to over consumption of aluminum (ex. greater risk for Alzheimer's) and I would rather just cut out as much aluminum as I can, where I can.  If you can't find this, you can make your own, just do this in small batches.

Aluminum-Free Baking Powder
1 Tbsp. baking soda
2 Tbsp. cream of tartar
1 1/2 Tbsp. cornstarch (organic)

Mix together and store in an air-tight container.  Moisture will reduce it's effectiveness.  


Saturday, March 9, 2013

Vanilla Cinnamon Grapefruit Soda


My sister received a gift card to the restaurant True Foods and invited my mom and I to have lunch with her.  Their food is more healthy/natural with real ingredients made fresh.  While we were there we ordered this house-made grapefruit soda.  It was really refreshing and I couldn't get it out of my head even days later.  So, I decided to try and recreate it on my own.  Soda is not something I really drink anymore since going processed free, but making one at home is not that hard and I can control the sweetener.  What I liked about the one at the restaurant its that it had no added sugar.  How's that for a great soda alternative!  I'm sure that if anyone actually knows how they make it at True Foods they would say I'm doing it wrong, but I still like the result I got.  Here's what you need.

1 grapefruit (the more pink/red the better because they are naturally a little sweeter) I prefer Texas Red
cinnamon
pure vanilla extract
liquid vanilla stevia
sparkling water (this is not straight seltzer or mineral water - the ingredients should just say "carbonated water")


In a small sauce pan, add the juice and pulp from the grapefruit.  If you have a really large, juicy grapefruit then add anywhere from 3/4 tsp. to 1 tsp. of cinnamon.  If it's not that big or doesn't seem like that much juice, add only a 1/2 tsp.  Set this on the stove and bring to a boil.


After a minute it will really bubble and you'll have to stir it constantly for about 5 to 7 minutes.  You are wanting to reduce the liquid by half to concentrate the grapefruit flavor and infuse it with the cinnamon.

You'll know to turn off the heat when it looks like it's only half of what it used to be.  Here's what it looks like after being cooked down.


Now, you will pour the liquid through a strainer to remove the pulp.  I like to strain in into a measuring cup to see how much I've ended up with.  If it's around 1/4 cup, I add 1/2 tsp. of vanilla.  If it's more than that, I will add anywhere between 3/4 to 1 tsp. of vanilla.  The last time I made this I ended up with 1/2 cup of the strained liquid - it was a big, beautiful, juicy grapefruit, so it required more cinnamon and vanilla - about 1 tsp. of each.  Oh, and by the way, don't throw away the pulp - it's delicious.  I like to put the cinnamon grapefruit pulp spooned over some of my clean vanilla ice cream recipe - it is so good!


Once you've added the vanilla to the cinnamon and grapefruit mixture, you are done making your syrup.  Easy, right?  Refrigerate it for a few minutes to cool it down.  Now you are going to make your soda.  This all has to do with your own personal tastes, but here are the general ratios I use for mixing - add more or less of anything you want.  For every cup (8 oz.) of sparkling water, I add 2 to 3 tsp. of the syrup.  You can drink it this way, but I prefer it with anywhere from 2 to 4 drops of vanilla stevia per cup as well.  My husband and kids like a few more drops of stevia than that, so it's all about personal taste.  I like to have the sparkling water already chilled because the ice melts too quickly otherwise and waters it down too much. You can always add more of the syrup if this happens.  I hope you try this and like it - I really do!

Thursday, February 7, 2013

Chocolate Sauce/Magic Shell


Once you've experienced life with chocolate sauce, there really is no going back.  Some things are just better covered in warm chocolaty goodness!  When I first started to go processed free, I thought that I would just have to learn to live without things like this because their ingredient list was so awful.  But, that was store bought chocolate sauce, not healthy homemade sauce.  My friend Staci shared her version of this classic finish and it has changed our lives.  Now desserts feel decadent and sinful without actually being so.

Equal parts:
cocoa powder
pure maple syrup
coconut oil

I usually make this in tablespoon portions (1 of each) because you don't typically need a lot at one time.  You must heat up the maple syrup and coconut oil or this will not be a smooth syrup.  Because coconut oil is solid at room temperature or colder, this needs to be at least slightly warm.  If you combine everything and it doesn't seem smooth enough, put the mixture in the microwave for a few seconds and it will make all the difference.  Below is a picture of only a tablespoon each, and you can see how much that makes.


I wanted to show how great this sauce is poured over desserts like the top picture.  That one shows a picture of my chocolate chocolate chip walnut zucchini muffins (recipe here) with this sauce, which was AMAZING!  But, I also wanted to show how this can become a kind of homemade magic shell when poured over something cold like ice cream.  


Here is my cleaned up vanilla ice cream (recipe here) topped with this sauce, and you can see that it is starting to harden because of the coconut oil.  It makes for a neat consistency when you eat it this way.  I promise you will not feel the least bit deprived with all this yumminess on your plate.  Enjoy!
 

By the way, this is not the kind of sauce to make chocolate milk with - that's different.  I'll share that recipe sometime soon too.


Thursday, January 31, 2013

Homemade Pasta Sauce


Have you ever wondered why the tomato sauce at an Italian restaurant is better than what you buy in a can or jar from the store?  If you have an Italian mama, like I do, you already know the answer.  You have to make it from scratch with quality ingredients!  And authentic pasta sauce is one that is fresh, not heavy with pasta swimming in it.  Now, don't be scared off by the idea of making it yourself - it's super easy and takes the same amount of time to cook the pasta from start to finish, making this an incredibly fast dinner for any night of the week.  This is my go-to recipe when I don't have a lot of time or I haven't gone to the store.  You will be amazed at the difference in taste and never want for anything but this processed free version ever again.  


1-2 cans of whole or diced peeled tomatoes (use 2 cans for every pound of pasta)
2-3 cloves of minced garlic depending on how much you like (or use garlic powder if you don't have any on hand)
freshly grated Parmesan cheese (I always have a block in my refrigerator)
salt
Italian seasoning/dried basil/dried oregano
coconut oil
olive oil

optional: fresh basil leaves torn or cut to add at the end

I have made it without the basil and it's still delicious, but the fresh basil always feels like the ultimate finishing touch in presentation and flavor.


Put on a pot of water to boil your pasta.  I use whole wheat or brown rice noodles.  I have heard good things about quinoa and artichoke pasta too, but I haven't tried them yet.  You can also use any kind of noodle too... spaghetti, penne, rigatoni, etc.  Don't forget to get out the sea salt and salt your boiling water right before the noodles go in.

In a skillet on medium heat, put about 2 Tbsp. of coconut oil and saute the garlic for a quick minute - don't let it burn!  Just get it to a golden color then pour in your can of tomatoes.  (My mother-in-law sends me home-canned tomatoes from her garden, and I have to admit, these are my favorite to use.)  Start to break up the tomatoes as you stir everything together.  Add salt to your tastes and sprinkle in any other kind of seasoning that you like - I gave you some ideas up above.  You want to cook out the water from the tomatoes, but not exactly boil it out, just a light bubble.  The tomatoes will continue to cook down and break apart as the water evaporates.  This all happens while your pasta water is heating then cooking your noodles - isn't that great!  When you pasta is almost ready and most of the water has evaporated from the sauce, grate in some fresh Parmesan cheese - no green can!  I like to use my microplane to get it really fine.  Add as much or as little as you want and stir it into the sauce - it will dissolve and not be visible. Then turn off the heat and add some finely chopped basil and a drizzle of olive oil.  In the picture below, I only used one can of diced tomatoes because I only cooked a half pound of pasta, but you can see how thick it turns out.


When the pasta is drained, I put it back in the pot it was cooked in and pour the sauce over the top to toss them together. When this is served, don't forget to add a few more grates of Parmesan to the top.  I promise you will love the fresh flavor and the speed at which this comes together for any night of the week!