Showing posts with label quick and easy. Show all posts

Wednesday, March 16, 2022

Sloppy Joes


I think Sloppy Joes are delicious!  But, what I like even more than the taste, is that this version is super fast and easy.  This is the kind of recipe that has few ingredients and comes together quickly on a busy weeknight.  Perfect for a family with little time.  

2 lbs. lean ground beef 
1/4 - 1/2 cup sugar free ketchup
1/4 - 1/2 cup mustard
1/4 - 1/2 cup coconut sugar (or brown sugar substitute)
*optional: garlic and onion powder

Brown the ground beef in a skillet and season with salt and pepper.  Add garlic and onion powder if you want to as well.  Once browned, add in the ketchup, mustard and coconut sugar.  Put in as much as you want in equal parts.  The more you put in, the more saucy it will be.  Serve on whole grain buns or a bread substitute.  


By the way, this is my favorite ketchup.  I buy it at Sprouts and it has only clean ingredients and tastes great!  It also has some added veggies which makes this a winner!


Saturday, August 3, 2019

Gyro Lettuce Wraps


I love gyros!  I first had one when I was young and we lived in Europe.  Everyone pronounced the sandwich differently, but I quickly decided that it was delicious - no matter how you said it's name. My husband and I have been cutting out some carbs, but I really wanted a gyro.  So instead of saying, we can't eat that, I decided we could still enjoy all those fantastic flavors without the bread.  And these did not disappoint!  In fact, I didn't miss the bread - and I love bread. These were also ridiculously fast to make.  I think I had dinner on the table in less than 10 minutes!

gyro meat
butter, Boston or bib lettuce
chopped tomatoes/cherry tomatoes
sliced cucumber
thinly slice red onions
Tzatziki sauce (homemade or a clean store bought option)

Warm the gyro meat and assemble the lettuce wraps by layering the meat, tomatoes, cucumber and onions into a lettuce cup.  Drizzle the sauce over top and enjoy!

(The picture doesn't show it with onions because my husband doesn't like them, but they are a good addition.)

BBQ Chicken Salad


When I first got married, a good friend of mine gave me a recipe box with a few of her favorite recipes.  This chicken salad was one of them.  It is easy to make and everyone I have made it for always loves it.  Depending on each ingredient you use, this can be personalized to make it processed free, paleo, keto, low carb, etc.  Even vegetarian if you omit the chicken!  That also makes this a good option if you need something for guests and you don't know what kind of diet they are on.

shredded chicken
lettuce/salad greens
tomatoes
bell peppers
avocados
black beans
corn
cheese
tortilla chips

Dressing is equal parts:
BBQ sauce (homemade or low/no sugar)
Ranch dressing (homemade or as clean as possible)

This can be assembled and tossed together in one big bowl or it can be individually put together by each person.  Then they can add as much or as little of each item that they want, kind of like a buffet-style salad.


Friday, February 22, 2019

Citrus Coleslaw


Have you ever wanted fresh fruits and vegetables in a non-heavy kind of slaw?  One that isn't mayonnaise based with lots of other chemicals lurking behind the scene?  Want it to be refreshing too?  Well, this is the recipe for you - it was for me!  I had this slaw at a dinner party and fell in love with it.  The host was clear on the ingredients list, but vague as to actual amounts because she felt you could add however much you wanted of any one ingredient to suit your own tastes.  Normally, I like a straight forward recipe, but this one is particularly forgiving and really great to make how you like it.  It is totally fresh and completely processed free.  I'll give some rough estimates for the ingredient list, but personalize this to your own tastes. 

1/4 to 1/2 head of shredded purple cabbage
1 cup shredded carrots
1 zucchini, shredded
6 to 7 radishes, shredded
1/2 to whole apple, shredded (I like pink lady)
1/2 to 1 cup pineapple, finely chopped
1/4 to 1/2 cup fresh pineapple juice
zest of 1-2 limes and their juice
(optional: add a bit of freshly grated ginger)

Combine all in a bowl and stir - it's that simple!  I really have made this with lots of varying amounts and it has always tasted great.  I take a bite and see what else it needs and call it good. 

Thursday, September 6, 2018

Korean Beef and Rice


One night I was looking through my fridge, freezer, and pantry trying to come up with a quick, last minute dinner idea.  I had not had time to plan ahead nor did I have much time to spend cooking that particular night.  I found some ground beef and decided that some of my typical ground beef dishes were just not going to cut it.  I did a little internet search and found a good alternative that sounded fast, hence the Korean beef.  I made a few easy swaps to make it processed free and dinner was served.  What I didn't expect was how much my family loved it!  I had a husband who said it was a new favorite and 4 children who gobbled down their dinner - which rarely happens!  This recipe was so ridiculously easy and fast, and for it to turn out to be such a crowd pleaser really made my mom heart happy and my dinner planning and execution schedule much lighter.  This is a recipe to add to your regular rotation for sure!

1 lb. ground beef
3 cloves of minced garlic (optional)
1/4 cup coconut sugar or sucanat
1/4 cup liquid aminos or low sodium soy sauce
2 Tbsp. sesame oil
1/4 tsp. ground ginger
1/4 tsp. black pepper
cooked brown rice

optional garnish:
sesame seeds
sliced green onion

Brown the ground beef in a skillet and half way through the cooking process add the garlic and a little salt and pepper.  Once it is fully cooked add the coconut sugar, liquid aminos, sesame oil, ginger, and pepper.  Turn down the heat to low and stir to coat the meat evenly. 


Let this cook for another 5 minutes to concentrate and incorporate all the flavors.  Serve over brown rice with the optional garnish of sesame seeds and/or sliced green onion.

I think you really will love this as much as we have.  I have made this about 4 other times before posting the recipe and each time it's been the same result - happy eaters!  And I love that I haven't slaved in the kitchen.

Tuesday, May 8, 2018

Black Beans and Rice


Thank you to my good friend Jill for passing this recipe along.  Not only is it processed free, it's delicious and cheap.  Definitely a budget friendly, meatless meal to add to the rotation.  My kids even told me I should make this again.  That means it's a winner.  I think you'll enjoy this easy dish!

Cooked brown rice (I cook 2 cups of brown rice in 4 3/4 cups water in my rice cooker -takes about an hour)
1 Tbsp. olive oil or coconut oil
1/2 onion chopped or pureed (use a whole onion if you want)
1 green bell pepper, diced
2 cloves of garlic, minced
1 tsp. salt
1/4 tsp. pepper
1 tsp. cumin
2 cans black beans, rinsed and drained (15.5 oz cans)
1 cup water
1 tsp. dried oregano
1 Tbsp. red wine vinegar
radishes
cilantro

Cook the onion, pepper, garlic, salt and pepper in the oil until it all becomes soft, about 5 to 7 minutes.  Then stir in the cumin for another minute or so.  Add in the beans, oregano, water and cover the pot.  Let it simmer for about 10 minutes.  Turn off the heat and add the vinegar.  Smash some of the beans to help thicken the mixture.  Serve this over the warm, cooked rice with radish and cilantro.


I like to chop up the fresh cilantro so that no one gets a leaf to big or a long piece of stem.  I also grate several radishes because they are easier to eat and lose some of the bite that is typically there when you just slice them.  


I think this will be a good, easy, fast, budget friendly meal for most people.  For us, it checks all the boxes!

Wednesday, February 10, 2016

Tacos Without The Shell


I've mentioned several times that my husband is supposed to have little to no grains for his health.  I was craving tacos the other night, but didn't want to make him feel left out if the kids and I had a taco shell - even if it was processed free.  My solution was to find a different kind of shell.  Besides, the shell is really just a vehicle for all the yummy taco goodness inside anyway.  I ended up swapping it for for lettuce and the results were amazing!  No one missed the shell - not even a little.

shell swap - Boston, bib or butter lettuce leaves
taco meat the way you like it (I like lean ground turkey with my homemade taco seasoning)
toppings: tomato, cheese, sour cream, guacamole, etc.

This was a super fast dinner to make and one we all enjoyed.  Be sure to make your own taco seasoning if you choose to use it, otherwise this won't be processed free.  I'm not saying we'll never have a taco shell again, but this was a fabulous alternative.

Friday, January 29, 2016

Coconut Flour Popovers


I think popovers are really delicious, easy, and fun.  My kids love to watch them puff up through the oven door and sink a little as they cool.  We are trying to eat less grains because of my husband, so this recipe is in his honor.  The addition of the coconut flour will make these slightly different from a regular popover, but they are still really easy and delicious.  Plus, it's always good to know a processed free version of any recipe, right?

2 Tbsp. butter
4 eggs
1/2 cup milk (use almond or coconut if you are dairy free)
3 Tbsp. coconut flour (accurately measure - don't approximate with this flour)
1/2 tsp. sea salt

Preheat oven to 425 degrees.  Cut off one tablespoon of cold butter at a time for a total of two, and slice each one in half, then each half into 3 pieces.  This should make 12 equal-sized, small pieces of butter.  Place each one inside a 12 count muffin tin and place this in the over to let the butter completely melt and the pan to heat up.  Watch that you don't allow the butter to burn while you are making the batter.  In a blender, pour in the eggs, milk, coconut flour, and salt.  Blend until smooth.  Remove the hot muffin pan with the melted butter and pour in the batter filling each cup about half full.  


Bake for 20 minutes or until puffed and golden.  Don't open the oven door while they are cooking or they will deflate and not rise again.  They will look very puffy when done, but shrink down as they cool.  You can eat these plain or top with an all fruit jam (no added sugar), more butter, or my favorite - a squeeze of fresh lemon juice and drizzle of real maple syrup!


Thursday, January 21, 2016

Clean Rice Crispy Treats


My kids love rice crispy treats.  I never make them with the traditional ingredients that are very processed and full of sugar.  Instead, I make this recipe.  It is loosely based on the one by Alicia Silverstone with just a few changes to fit my tastes and guidelines.  I think the addition of the peanut butter flavor is really delicious!

3/4 cup brown rice syrup
small pinch of sea salt
1/4 cup natural peanut butter, almond butter, cashew butter or sunflower seed butter
1/2 tsp. vanilla extract
3 cups whole grain brown rice cereal (no sugar added)
(optional: 1/4 cup dark chocolate chips)
coconut oil for greasing the pan

In a small sauce pan, heat the brown rice syrup and salt - you don't need to bring this to a boil.  Once it's smooth, add the peanut butter and let both completely heat through.  


Turn off the heat and stir in the vanilla.  Pour this over the brown rice cereal and coat everything.  If you want to add the chocolate chips, add them now.


Grease an 8x8 pan with coconut oil and pour in the mixture.  Let this completely cool before cutting into squares - about an hour.  Putting it in the refrigerator will speed up the time!  I hope you like these as much as we do!


Thursday, August 27, 2015

Watermelon Lime and Coconut Snow Cones

 
My friend Lenor, who is an amazingly creative cook, made a coconut watermelon smoothie for me out of frozen watermelon and coconut flavored syrup.  It was so delicious, but I wanted to come up with a sugar-less version for my family that didn't use coconut syrup since it is full of refined white sugar.  Not exactly processed free!  I also wanted to introduce one more flavor - lime.  Have you ever heard of people eating watermelon with a sprinkle of salt?  It may sound odd, but it does tend to add a nice flavor enhancement.  Lime can often take the place of salt in a recipe and add tremendous depth of flavor, as well as a freshness you just can't beat from citrus.  So this was my thinking in adding the lime.  The result was something absolutely wonderful, sweet, and completely processed free.  My kids gobble this up as if  they were being given the most delicious treat in the world. 
 
juice of one lime
1/4 tsp. coconut extract
3-4 drops liquid stevia
2 Tbsp. finely shredded unsweetened coconut
3 1/2 cups frozen watermelon chunks


Cut fresh watermelon into 1 inch squares and freeze in a zip top bag.  This will take hours, if not over night to freeze completely.  Once frozen, you are ready to make the snow cone.  Juice one lime and add the coconut extract and stevia to the juice and stir.  Pour this into the blender or food processor.  Add the shredded coconut and frozen watermelon.  Puree this until it all comes together.  You will have to stop the machine, scrape down the sides, and stir it together a few times.  Once the watermelon is not in chunks anymore and it's all the right consistency, give it one more stir to make sure all the flavors are incorporated evenly before serving.  You will see white bits of coconut throughout the snow cone. 

Another great thing about this recipe is that it doesn't melt as fast or in the same way as a regular snow cone made of water and syrup.  Because the base is watermelon, it stays together quite well - even to the last bite!  And the kids do not get as sticky with sugary syrup since there is none, not to mention stained by artificial food coloring.  I hope you enjoy this as much as our family.  This has become one of our favorite summer treats - with no refined sugar!


Wednesday, July 29, 2015

Berry Yogurt Parfait

 
I'm about to have a little love fest of photos for my berry yogurt parfait!  It has been my very favorite breakfast of the last few months, and I'd even go as far as calling it a dessert - it's that good!  
 
It's chalked full of yumminess without any refined sugar, which makes it processed free.  This comes together in no time (especially if you use berries that don't need to be cut up) and puts a smile on my face every morning I eat it.  Now that's worth waking up for!

 
plain organic whole milk yogurt (I like goat's milk yogurt)
organic heavy cream
vanilla crème liquid stevia
fresh berries
coconut sugar and cinnamon blend (see mine here)

Put enough yogurt in a bowl for one serving.  Pour a splash of cream in and about 5-6 drops of vanilla crème stevia.  Stir to combine.  Top with fresh berries and sprinkle on your desired amount of coconut sugar and cinnamon. 

 
Here are my favorite brands of yogurt and stevia:


Wednesday, July 22, 2015

Bean Pasole


Everyone needs a few recipes that can come almost entirely from the pantry.  This is one of those recipes - you can basically have everything on hand you need to make it without a shopping trip.  This is something I keep in my hip pocket for a day when I don't feel like cooking, haven't been to the store, or don't have time to babysit the process.  The basics of this soup came to me from my friend Amanda.  She delivered this to my house one day when I was horribly sick.  My whole family loved it and I asked her for the recipe.  It only took minor changes to make this processed free and now we eat it all the time! 
 
2 - 15 oz. cans hominy (rinsed and drained)
2 - 15 oz. cans of beans (pinto, navy, kidney, etc.) I usually choose 2 different kids to look pretty
32 oz. container (4 1/2 cups) reduced sodium chicken or vegetable broth
16 oz. jar of thick and chunky medium salsa (no sugar added)
2 tsp. dried oregano
1/2 cup heavy whipping cream (or 6 Tbsp. milk + 3 Tbsp. butter)
 
optional toppings: cheese, avocado, tortilla strips, chopped cilantro, etc.
 
Put all the ingredients, except the cream, into a crockpot and cook on low 7 to 8 hours or on high for 3 to 4 hours.  30 minutes before serving, pour in the cream, stir, and recover.  Serve as is or add some additional toppings. 
 
Truth be told, I almost never add any other toppings because I haven't been to the store to get them.  Sometimes it's just a sprinkle of cheese.  You could also easily add some leftover roast, pork, or chicken to this if you are looking to use up a small amount of cooked meat.  This is very forgiving and ridiculously fast and easy.  
 

Saturday, May 2, 2015

Chicken and Quinoa Lettuce Wraps

 
I found the idea for filling lettuce wraps with quinoa on pinterest and thought it was a brilliant idea!  My husband is supposed to go grain free for three months and I've been trying to put together recipes and meal plans that include three criteria: processed free, grain free, and delicious!  These lettuce wraps absolutely qualify.  These are also very kid friendly which is a bonus.
 
3 large chicken breasts
3 Tbsp. extra virgin olive oil
1 Tbsp. toasted sesame oil or regular sesame oil
4 Tbsp. liquid aminos or low sodium soy sauce
3 cloves of garlic, minced
1 tsp. freshly grated ginger or 1/4 tsp. ground ginger
 
2 heads of lettuce - Boston, bib or butter
shredded carrots
shredded or sliced cucumber - I like English cucumber because they have less seeds
chopped cilantro
peanut sauce
 
Combine the olive oil, sesame oil, liquid aminos, garlic, and ginger in a gallon size zip top bag.  Add the chicken breast and seal it up.  Squish around the marinade ingredients so that the chicken is completely coated and let it sit in the refrigerator for about 20 to 30 minutes or longer.  While you wait, cut the veggies, put them on a platter, and make the peanut sauce (here's my easy two ingredient recipe).  Cook the chicken breasts in a couple tablespoons of coconut oil.  Then move to a cutting board and let them rest for a couple minutes before cutting them.  You can cut them in strips or cubes - doesn't matter.  I consider this an assemble yourself dinner, but for the kids, they liked everything separate with no sauce.  Whatever suits your fancy!


Quinoa in the Rice Cooker

 
My life just got even easier the day I learned you could make quinoa in a rice cooker!  I know it's not that complicated on the stove top, but how much better is it to throw everything in and just walk away.  That's my favorite kind of cooking!  Plus, this is ready in about 15 minutes, so I can turn it on, prep the rest of the meal and in no time everything is ready to eat.  Here are the basics, but you can play around with the ratios to make this how you prefer.
 
1 cup rinsed quinoa
2 cups liquid
1/2 tsp. salt
 
Do not skip the step of rinsing the quinoa or it will be kind of bitter.  Just pour it in a fine strainer and rinse in the sink - this will only take you about 30 seconds.  As far as the liquid goes, I use one cup water and one cup chicken stock, but you could use all water, all chicken or vegetable stock, etc.  Dump it all in the rice cooker, put on the lid, and press the button.  Done to perfection!
 
If you are trying to go grain free, this is a fantastic substitute for rice in just about any dish.  It's also good all by itself.  Get creative and add all kinds of chopped veggies, vinaigrettes, seeds, nuts, cheese crumbles, etc.  Plus, quinoa is high in protein - great for my whole family!

2 Ingredient Peanut Sauce


This peanut sauce is ridiculously easy - I mean, my two year old can make this!  Technically it's more than two ingredients, but you only need to add two things to the bowl.  I love that this is processed free, but not taste free and super healthy.  Anyone want peanut sauce last minute?  Coming right up!

Organic Natural Creamy Peanut Butter (just peanuts and salt)
Braggs Ginger and Sesame Salad Dressing

Combine equal parts of both peanut butter and salad dressing.  Stir to combine - that's it! 

You can heat this up if you want it warm or serve it cold.  If you want some texture, you could use chunky peanut butter or add some chopped peanuts after you make it.  If you prefer more peanut taste, add more and visa versa for the ginger sesame dressing.  Serve this with whatever you like.  Here are a few ideas - lettuce wraps, chicken satay, pasta, stir fry, baste salmon etc.  Have fun trying this on whatever sounds good!

Sunday, April 26, 2015

Honey Popcorn


A friend of mine shared her family recipe for a sweet popcorn treat.  She told me they have always made a melted butter and honey combination that they pour on popcorn for a special snack or treat.  I loved this idea because who doesn't like a salty-sweet combo?  Plus, this is a processed free snack/treat I don't mind giving my kids in the place of caramel or kettle corn.  My family goes nuts for this!  Thank you Jody for sharing!!!

1/2 cup un-popped popcorn
4 Tbsp. butter (1/2 stick)
3 heaping Tbsp. raw honey
1/4 tsp. salt

I use an air popper to make the popcorn, but you can pop it on the stove if you prefer.  While it's popping, I grab a very small pot and melt the butter.  This will only take about a minute.  Then stir in the honey and salt.  Pour this over the popped popcorn and toss to evenly distribute. 

I have also made this with coconut oil instead of the butter and this resembles much more of a sweet, less salty treat - more caramel corn like.  This is also really good if you swap the honey for pure maple syrup!

Cauliflower Leek Soup

 
I saw the idea of this soup on pinterest, but there were no exact measurements to recreate it.  I love discovering recipes that include more vegetables and can be processed free, so I played around with this until I figured out a soup I liked and could recreate.  This is super fast and easy, but you don't have to admit that if you don't want to!

3 Tbsp. butter or coconut oil
8 oz. bag of clean leeks chopped, or 2 leeks cleaned and chopped
2 cloves of garlic, crushed
1 head of cauliflower, cut into smaller pieces
32 oz. package of chicken or vegetable broth (4 1/2 cups)
salt and pepper

In a pot, saute the leeks in the butter/coconut oil until soft.  Add the garlic and saute another minute. Add the cauliflower and chicken broth and cover the pot.  Cook until the cauliflower is soft, about 10 minutes.  Uncover and blend in the pot with an immersion blender or in small batches in a regular blender.  Add salt and pepper to taste.  This will need some salt, so don't forget it!


You can add some toppings if you want.  My suggestions would be a drizzle of olive oil, freshly grated parmesan cheese or cheddar cheese, maybe a sprinkle of bacon or freshly chopped parsley.  This soup is good on it's own, but looks fancier with toppings. 

Tuesday, December 2, 2014

Whole Wheat Chocolate Chip Cinnamon Rolls


Some good friends of ours used to make these biscuit chocolate chip cinnamon rolls for our family and deliver them warm to our door.  Talk about irresistible!  When we moved away, I knew I wanted to get the recipe, but I wanted to try making these processed free.  What I found was that my kids loved them just as much as ever - success!  Because it's a biscuit dough, these are super simple, don't require a rise time, and there is no glaze or frosting needed.    

Dough:
2 cups whole wheat pastry flour
3 Tbsp. sucanat or coconut palm sugar
4 tsp. baking powder
1 tsp. salt
1/2 cup shortening (non-hydrogenated)
3/4 cup milk

Filling:
3-4 Tbsp. melted butter
sucanat
cinnamon
chocolate chips

Preheat oven to 450 degrees.  Combine the flour, sugar, baking powder and salt in a medium sized bowl.  Add the shortening and use a pastry cutter to combine them until it looks like crumbs.  Add the milk and stir into the dough.  Add a little flour to knead it into a ball.  Sprinkle flour on a flat surface and roll it into a flat rectangle.  Cover the flattened dough with melted butter and sprinkle the dough with the desired amount of sucanat, cinnamon, and chocolate chips.


Roll into a log and cut into 12 pieces - about 1 inch thick.  place on an ungreased cookie sheet and bake for 12 minutes. 


I use dental floss to cut them by sliding it under the log, then pulling the two sides to meet and make a nice cut without squishing the dough.  I also cut it in half first, then those two pieces in half and each of those into three to make the pieces pretty even. 

I know I'm a bit vague about the amounts for the filling, but you can really just eye ball what will cover the dough and how much or little you like of each component - ex. more cinnamon, less chocolate chips.  These are fast and very forgiving if you are allowing your kids to help in the whole process as well.  Have fun with it!

Thursday, November 6, 2014

30 Second Raspberry Cinnamon Jam


This "recipe" is one of those everyday, I don't think about this as a recipe, kind of foods.  This is my version of raspberry jam with the added warmth of cinnamon.  I make this all the time, especially for sprouted grain toast or bagels in the morning, but because I only make as much as I need for one time and always eye-ball the proportions, I hesitate to call it a recipe.  It's sweet, and tart with a hint of spice, and of course, processed free. Here's the idea of it:
 
a handful of fresh raspberries
a sprinkle of coconut cinnamon sugar (find it here)
 
Put the raspberries in a small bowl, shake the desired amount of coconut cinnamon sugar on top and proceed to mash and mix it all together with the back of a spoon.  This works best with raspberries as opposed to other berries because they easily separate, yet remain gelatinous like a jam or jelly.  Now you can use this however you like.  I only use about a 1/4 tsp. or less of the coconut cinnamon sugar - it truly is just a sprinkle, but add what you like.  I hope you enjoy this - we certainly do!


Monday, September 22, 2014

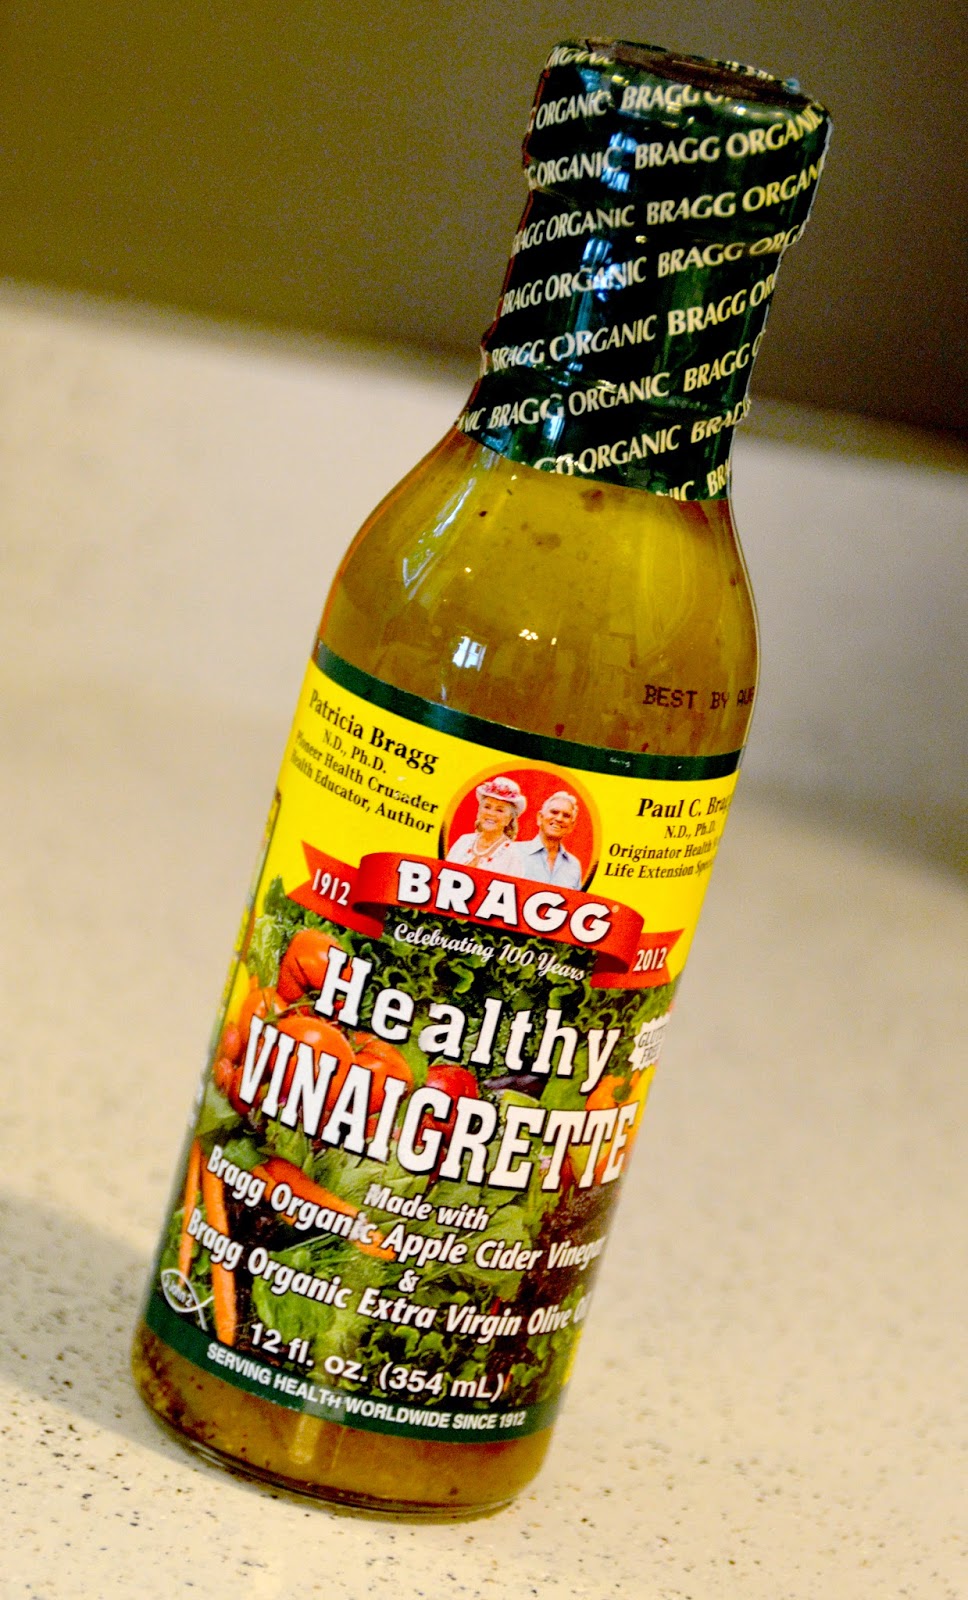
Healthy Store-Bought Dressing

 
I like a homemade salad dressing, but let's be serious - who always has time for that?!  Or all the ingredient on hand.  Let me tell you about my go-to salad dressing.  This is my favorite because I can pronounce every ingredient and they are foods I would put in my body anyway.  It's Bragg's brand healthy vinaigrette.  I put this on every kind of salad I make.  It pairs really well with savory or sweet salads and the best part is I didn't have to make it from scratch.  This makes having a big salad everyday super easy.  Here's what's in it: organic apple cider vinegar, organic extra virgin olive oil, purified water, organic honey, organic garlic, liquid aminos, organic onion, organic black pepper and natural xanthan gum. 
 
 
I have been up and down the salad dressing section of my local grocery stores and never found a good alternative that is processed free.  Well, look no further.  Here are three other kinds that boast an ingredient list just as good as the healthy vinaigrette.  Now you can get berry, Hawaiian, and ginger sesame dressings without having to make them yourself all the time.  This also gets bonus points for being available in almost every grocery store, just look in the health food section.  Talk about clean and easy!