Showing posts with label kid friendly. Show all posts

Wednesday, March 16, 2022

Sloppy Joes


I think Sloppy Joes are delicious!  But, what I like even more than the taste, is that this version is super fast and easy.  This is the kind of recipe that has few ingredients and comes together quickly on a busy weeknight.  Perfect for a family with little time.  

2 lbs. lean ground beef 
1/4 - 1/2 cup sugar free ketchup
1/4 - 1/2 cup mustard
1/4 - 1/2 cup coconut sugar (or brown sugar substitute)
*optional: garlic and onion powder

Brown the ground beef in a skillet and season with salt and pepper.  Add garlic and onion powder if you want to as well.  Once browned, add in the ketchup, mustard and coconut sugar.  Put in as much as you want in equal parts.  The more you put in, the more saucy it will be.  Serve on whole grain buns or a bread substitute.  


By the way, this is my favorite ketchup.  I buy it at Sprouts and it has only clean ingredients and tastes great!  It also has some added veggies which makes this a winner!


Tuesday, May 8, 2018

Black Beans and Rice


Thank you to my good friend Jill for passing this recipe along.  Not only is it processed free, it's delicious and cheap.  Definitely a budget friendly, meatless meal to add to the rotation.  My kids even told me I should make this again.  That means it's a winner.  I think you'll enjoy this easy dish!

Cooked brown rice (I cook 2 cups of brown rice in 4 3/4 cups water in my rice cooker -takes about an hour)
1 Tbsp. olive oil or coconut oil
1/2 onion chopped or pureed (use a whole onion if you want)
1 green bell pepper, diced
2 cloves of garlic, minced
1 tsp. salt
1/4 tsp. pepper
1 tsp. cumin
2 cans black beans, rinsed and drained (15.5 oz cans)
1 cup water
1 tsp. dried oregano
1 Tbsp. red wine vinegar
radishes
cilantro

Cook the onion, pepper, garlic, salt and pepper in the oil until it all becomes soft, about 5 to 7 minutes.  Then stir in the cumin for another minute or so.  Add in the beans, oregano, water and cover the pot.  Let it simmer for about 10 minutes.  Turn off the heat and add the vinegar.  Smash some of the beans to help thicken the mixture.  Serve this over the warm, cooked rice with radish and cilantro.


I like to chop up the fresh cilantro so that no one gets a leaf to big or a long piece of stem.  I also grate several radishes because they are easier to eat and lose some of the bite that is typically there when you just slice them.  


I think this will be a good, easy, fast, budget friendly meal for most people.  For us, it checks all the boxes!

Tuesday, January 3, 2017

Potato Salad


I know everyone thinks their mom's potato salad is the best, and I guess I'm no exception.  Our whole family swears by this simple, yet delicious version with no fills or fuss.  To me, this will always be the way potato salad should be - thanks Mama!  

4 lb. bag red potatoes
1 dozen eggs
3/4 of a 15 oz. jar of mayonnaise (I like safflower mayo or Veganaise)
salt and pepper

First, hard boil the eggs.  In a medium pot, place the eggs and cover with cold water.  Bring to a boil, then turn off the stove and cover for 12 to 13 minutes.  Pour out the warm water and run the eggs under cold water.  Peel and chop.  Set aside.  Dice the potatoes (you can peel them first, but it's more nutritious to leave the peel on) and put them in a large pot.  Cover with water and add salt - potatoes need salt!  You'll also be able to add more later if you need to.  Cook until tender.  Drain in a colander and run cold water over the top.  Stir the eggs, potatoes and mayo together with salt and pepper to taste.  The egg yolks will mix with the mayo and make the most delicious, creamy sauce.  Check for seasonings (especially if it needs more salt) and you're ready to serve!


Friday, January 29, 2016

Chocolate Avocado Frosting


I feel like I'm cheating with this recipe a little bit because it's the same recipe as my chocolate pudding and fudgesicles.  My justification is that when you find a really versatile, processed free, delicious recipe, you just run with it! This is a creamy, rich frosting with no refined sugar or unhealthy oils.  Those have been replace with raw honey and avocados.  I understand this might not be for everyone, but even my sister who doesn't like avocados likes this recipe.

2 avodados
1/2 cup cocoa powder
1 tsp. vanilla extract
1/4 cup raw honey
1/8 tsp. salt

Put everything in a small food processor and turn it on until all the ingredients are mixed and creamy.  This makes enough to cover the top of a 9x13 inch cake.  You can double it to make a thicker layer or enough to put between layers as well.  This is best spread on the cake and refrigerated to firm it up before cutting, but you don't have to.  Store leftover frosting and/or frosted cake in the refrigerator.

Coconut Flour Popovers


I think popovers are really delicious, easy, and fun.  My kids love to watch them puff up through the oven door and sink a little as they cool.  We are trying to eat less grains because of my husband, so this recipe is in his honor.  The addition of the coconut flour will make these slightly different from a regular popover, but they are still really easy and delicious.  Plus, it's always good to know a processed free version of any recipe, right?

2 Tbsp. butter
4 eggs
1/2 cup milk (use almond or coconut if you are dairy free)
3 Tbsp. coconut flour (accurately measure - don't approximate with this flour)
1/2 tsp. sea salt

Preheat oven to 425 degrees.  Cut off one tablespoon of cold butter at a time for a total of two, and slice each one in half, then each half into 3 pieces.  This should make 12 equal-sized, small pieces of butter.  Place each one inside a 12 count muffin tin and place this in the over to let the butter completely melt and the pan to heat up.  Watch that you don't allow the butter to burn while you are making the batter.  In a blender, pour in the eggs, milk, coconut flour, and salt.  Blend until smooth.  Remove the hot muffin pan with the melted butter and pour in the batter filling each cup about half full.  


Bake for 20 minutes or until puffed and golden.  Don't open the oven door while they are cooking or they will deflate and not rise again.  They will look very puffy when done, but shrink down as they cool.  You can eat these plain or top with an all fruit jam (no added sugar), more butter, or my favorite - a squeeze of fresh lemon juice and drizzle of real maple syrup!


Crispy Brown Rice Cereal


Are you looking for a cereal that uses whole grains, is gluten free, and low in sugar?  Here is one of my favorites.  Erewhon Crispy Brown Rice cereal is my family's answer to the classic crisp rice cereal.  Just look at the ingredients for yourself - it's awesome.  Processed free doesn't mean you can't find good packaged ingredients in the store.  This company has got my stamp of approval!


Thursday, January 21, 2016

Clean Rice Crispy Treats


My kids love rice crispy treats.  I never make them with the traditional ingredients that are very processed and full of sugar.  Instead, I make this recipe.  It is loosely based on the one by Alicia Silverstone with just a few changes to fit my tastes and guidelines.  I think the addition of the peanut butter flavor is really delicious!

3/4 cup brown rice syrup
small pinch of sea salt
1/4 cup natural peanut butter, almond butter, cashew butter or sunflower seed butter
1/2 tsp. vanilla extract
3 cups whole grain brown rice cereal (no sugar added)
(optional: 1/4 cup dark chocolate chips)
coconut oil for greasing the pan

In a small sauce pan, heat the brown rice syrup and salt - you don't need to bring this to a boil.  Once it's smooth, add the peanut butter and let both completely heat through.  


Turn off the heat and stir in the vanilla.  Pour this over the brown rice cereal and coat everything.  If you want to add the chocolate chips, add them now.


Grease an 8x8 pan with coconut oil and pour in the mixture.  Let this completely cool before cutting into squares - about an hour.  Putting it in the refrigerator will speed up the time!  I hope you like these as much as we do!


Monday, January 18, 2016

Chicken Enchilada Pasta


I'm not going to take any credit for the creativity of this dish.  I found the idea on pinterest and only made minor changes to make it processed free, but wow, it's good!  If you like Mexican flavors, this will be right up your alley.  Plus, my whole family gobbled this up.  It's always good to have a dinner you know will go over well with everyone.  The additional toppings really made this easy to customize too.  I think you'll enjoy this easy, fun twist on a pasta dish.

2-3 cooked chicken breasts, shredded
2 Tbsp. coconut oil
1 diced or pureed onion
1 diced red pepper
2 cloves of minced garlic
1 4 oz. can diced green chilies
2 10 oz. cans mild green enchilada sauce
1 10 oz. can red enchilada sauce
1/2 tsp. salt
1 tsp. cumin
1-2 tsp. chili powder (depending on how much heat you like)
2 cup shredded cheese (Mexican blend, Monterrey Jack, Colby or Cheddar)
1 cup sour cream
1 lb. whole wheat or sprouted grain pasta (any shape - I like rigatoni best)

Toppings: shredded cheese, sliced olives, avocado, cilantro, tomatoes, green onions, sour cream

Heat a large, high-sided pan or medium sized pot on medium heat and let the onions cook for a few minutes in the coconut oil until soft.  Add the red pepper and garlic and let them also soften.  Pour in the green chilies, 3 cans of enchilada sauce, shredded chicken, salt, cumin, and chili powder.  You want this to completely warm through and start to bubble - about 8 to 10 minutes.  Turn off the heat and stir in the shredded cheese.  Then stir in the sour cream completely and pour this entire mixture over the freshly cooked pasta.  Let everyone add their desired toppings and devour!

For ease, I used a rotisserie chicken and shredded the whole thing early in the day so when dinner time came, this was super fast to make.  This can also be easily doubled to feed a crowd, just use larger pots for cooking.

Sunday, January 3, 2016

Sour Cream Chicken Enchiladas


I grew up eating enchiladas and wanted to make a clean version of one of my favorites - sour cream enchiladas.  The first swap is the flour tortilla.  By the time you eat these, you won't even miss them.  Then, a clean sauce with processed free ingredients rounds this out.  The first time I made these, my husband scarfed them down and then asked if they were clean - of course!  He and the kids thought they tasted like regular enchiladas.  I loved that no one could tell the difference.  

10 small corn tortillas
2 1/2 cups cooked shredded chicken
2 cups shredded Monterrey jack cheese
1 cup shredded cheddar cheese
3 Tbsp. butter
3 Tbsp. sprouted whole grain flour
2 cups chicken broth
4 oz. can diced chilies
1 cup sour cream

Preheat the oven to 350 degrees.  Combine the 2 types of cheeses (or use all Monterrey jack) to equal 3 cups, and take 1 cup of this cheese mixture and combine it in a bowl with the shredded chicken.  Lay out the 10 tortillas and evenly spoon the chicken and cheese mixture along the center of each tortilla.  Roll them up and place them seam side down in a greased (I use coconut oil) 9X13 pan. 


In a medium sized pot, melt the butter then add the flour.  Cook this for about 1 minute and add the broth.  Bring to a boil and allow this to thicken.  Turn off the heat and add the chilies and sour cream.


Pour this over the top of the rolled tortillas trying to cover everything.  Top with the remaining 2 cups of cheese.  Bake for 20 to 25 minutes.


Don't these look delicious!  I'm super confident you won't be disappointed if you try these.

Thursday, September 10, 2015

Cauliflower Pizza Crust


We have all been trying to go grain-free because of my husband and add more vegetables to our meals at our house.  I had really been wanting to try a cauliflower pizza and this gave me the perfect opportunity.  After doing a little research and tweaking this to my own preferences, our recipe for cauliflower crust pizza was born.  This has many steps, but all of them are easy - in other words, this is not fast, but it is simple.  It's also surprisingly filling - must be all the veggies.  My favorite thing is that it is processed free.  Let pizza night begin!

Makes 2 medium pizza crusts

1 large head of cauliflower
2 eggs (beaten)
1 cup shredded mozzarella
1 tsp. fine sea salt
1 tsp. Italian seasoning
1/4 tsp. black pepper

Toppings of your choice: sugar free pizza sauce, cheese, shredded zucchini, olives, bell peppers, mushrooms, pepperoni, ricotta cheese, etc.

Preheat oven to 450 degrees.  Line a baking sheet with parchment paper and liberally grease it with olive oil.  Chop the cauliflower into small pieces and pulse until finely chopped in a food processor - not pureed though.  Pour into a microwave safe bowl and heat for 8 minutes then let it cool enough to handle. 


Put small batches into a tea towel and twist to remove as much moisture as you can - it has to be dry!  You may have to do this in several batches like I did.


Transfer to a bowl and add the other ingredients.  Shape into two crusts on the oiled parchment and bake for 15 to 17 minutes. 


Should be slightly golden.  Cool a little and add your toppings.  Bake again for 10 to 15 minutes or until the cheese has melted and started to bubble.


Feel free to experiment with your own seasoning and toppings.  I also think this is easier eaten with a fork rather than picked up like a traditional pizza slice.  Give this a try - you may find you like eating more veggies! 

Thursday, August 27, 2015

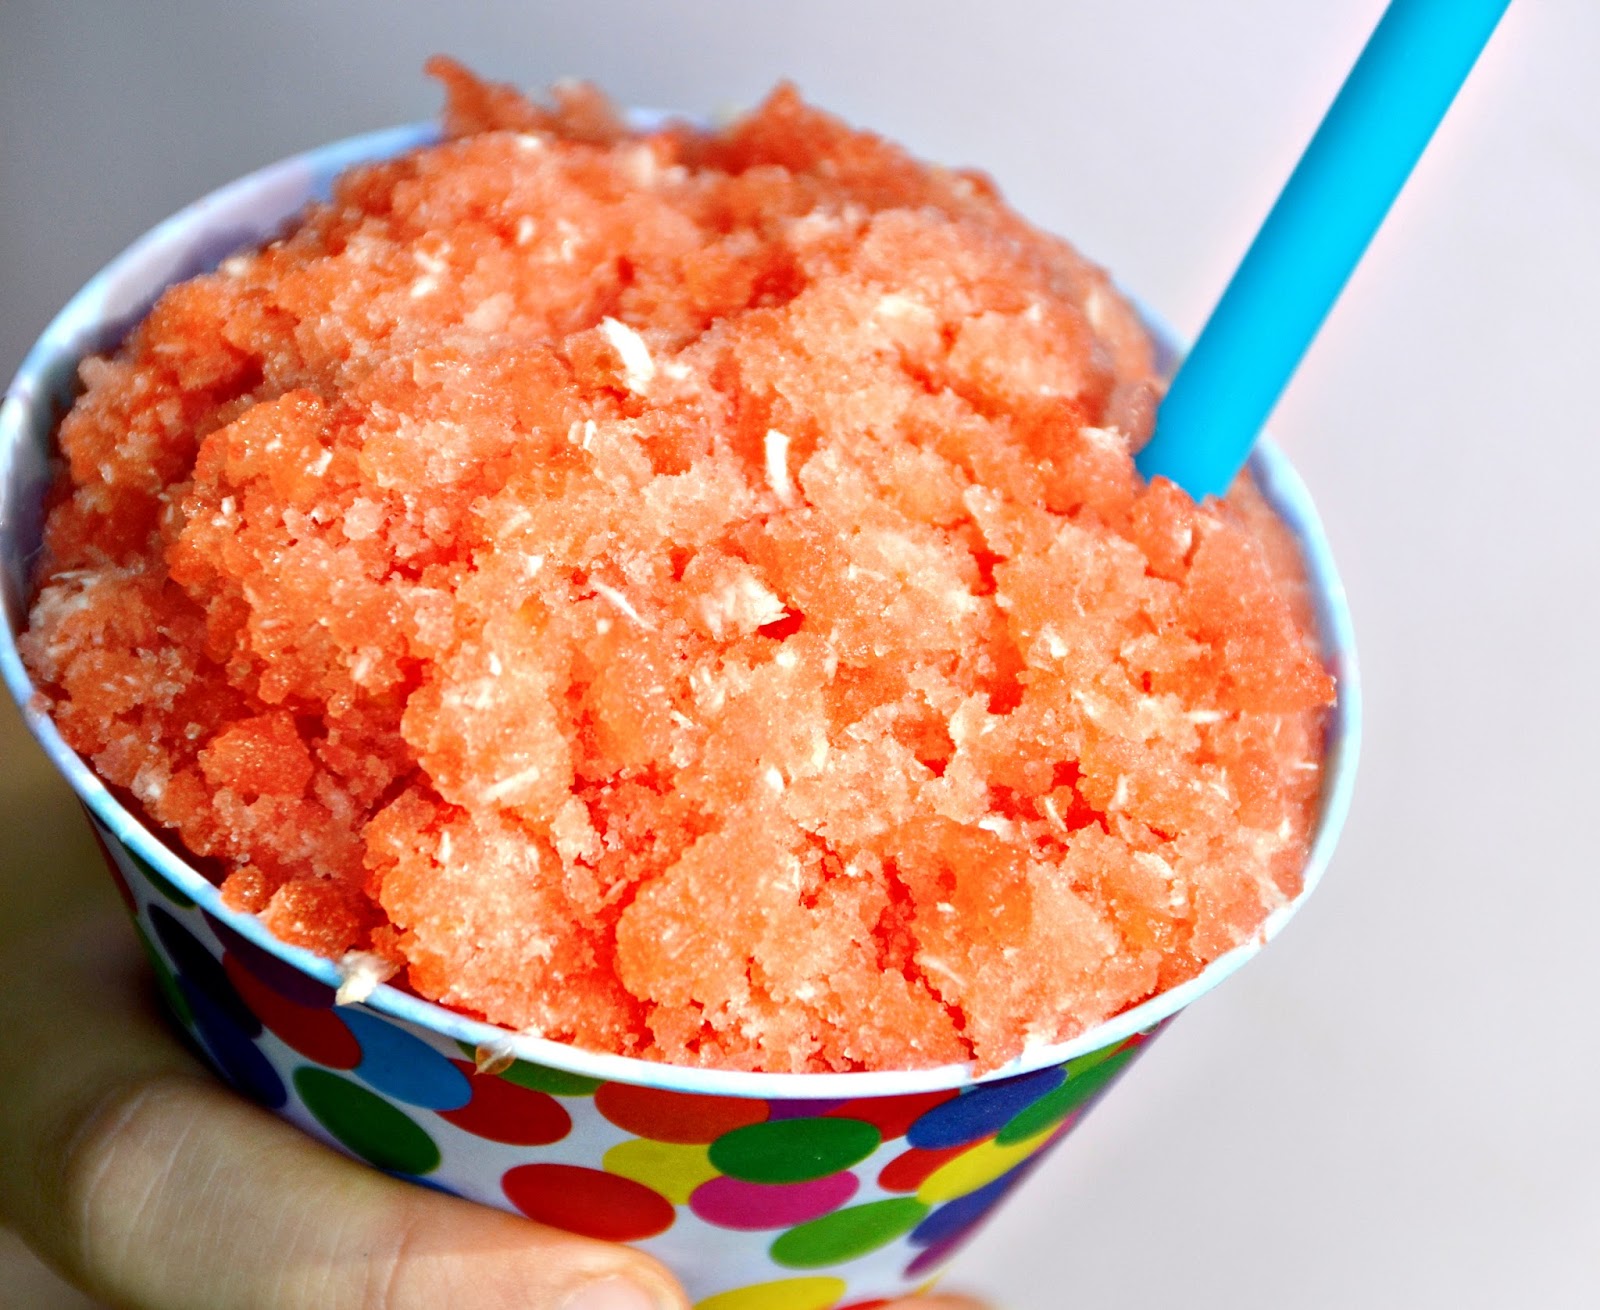
Watermelon Lime and Coconut Snow Cones

 
My friend Lenor, who is an amazingly creative cook, made a coconut watermelon smoothie for me out of frozen watermelon and coconut flavored syrup.  It was so delicious, but I wanted to come up with a sugar-less version for my family that didn't use coconut syrup since it is full of refined white sugar.  Not exactly processed free!  I also wanted to introduce one more flavor - lime.  Have you ever heard of people eating watermelon with a sprinkle of salt?  It may sound odd, but it does tend to add a nice flavor enhancement.  Lime can often take the place of salt in a recipe and add tremendous depth of flavor, as well as a freshness you just can't beat from citrus.  So this was my thinking in adding the lime.  The result was something absolutely wonderful, sweet, and completely processed free.  My kids gobble this up as if  they were being given the most delicious treat in the world. 
 
juice of one lime
1/4 tsp. coconut extract
3-4 drops liquid stevia
2 Tbsp. finely shredded unsweetened coconut
3 1/2 cups frozen watermelon chunks


Cut fresh watermelon into 1 inch squares and freeze in a zip top bag.  This will take hours, if not over night to freeze completely.  Once frozen, you are ready to make the snow cone.  Juice one lime and add the coconut extract and stevia to the juice and stir.  Pour this into the blender or food processor.  Add the shredded coconut and frozen watermelon.  Puree this until it all comes together.  You will have to stop the machine, scrape down the sides, and stir it together a few times.  Once the watermelon is not in chunks anymore and it's all the right consistency, give it one more stir to make sure all the flavors are incorporated evenly before serving.  You will see white bits of coconut throughout the snow cone. 

Another great thing about this recipe is that it doesn't melt as fast or in the same way as a regular snow cone made of water and syrup.  Because the base is watermelon, it stays together quite well - even to the last bite!  And the kids do not get as sticky with sugary syrup since there is none, not to mention stained by artificial food coloring.  I hope you enjoy this as much as our family.  This has become one of our favorite summer treats - with no refined sugar!


Saturday, May 2, 2015

Chicken and Quinoa Lettuce Wraps

 
I found the idea for filling lettuce wraps with quinoa on pinterest and thought it was a brilliant idea!  My husband is supposed to go grain free for three months and I've been trying to put together recipes and meal plans that include three criteria: processed free, grain free, and delicious!  These lettuce wraps absolutely qualify.  These are also very kid friendly which is a bonus.
 
3 large chicken breasts
3 Tbsp. extra virgin olive oil
1 Tbsp. toasted sesame oil or regular sesame oil
4 Tbsp. liquid aminos or low sodium soy sauce
3 cloves of garlic, minced
1 tsp. freshly grated ginger or 1/4 tsp. ground ginger
 
2 heads of lettuce - Boston, bib or butter
shredded carrots
shredded or sliced cucumber - I like English cucumber because they have less seeds
chopped cilantro
peanut sauce
 
Combine the olive oil, sesame oil, liquid aminos, garlic, and ginger in a gallon size zip top bag.  Add the chicken breast and seal it up.  Squish around the marinade ingredients so that the chicken is completely coated and let it sit in the refrigerator for about 20 to 30 minutes or longer.  While you wait, cut the veggies, put them on a platter, and make the peanut sauce (here's my easy two ingredient recipe).  Cook the chicken breasts in a couple tablespoons of coconut oil.  Then move to a cutting board and let them rest for a couple minutes before cutting them.  You can cut them in strips or cubes - doesn't matter.  I consider this an assemble yourself dinner, but for the kids, they liked everything separate with no sauce.  Whatever suits your fancy!


Sunday, April 26, 2015

Honey Popcorn


A friend of mine shared her family recipe for a sweet popcorn treat.  She told me they have always made a melted butter and honey combination that they pour on popcorn for a special snack or treat.  I loved this idea because who doesn't like a salty-sweet combo?  Plus, this is a processed free snack/treat I don't mind giving my kids in the place of caramel or kettle corn.  My family goes nuts for this!  Thank you Jody for sharing!!!

1/2 cup un-popped popcorn
4 Tbsp. butter (1/2 stick)
3 heaping Tbsp. raw honey
1/4 tsp. salt

I use an air popper to make the popcorn, but you can pop it on the stove if you prefer.  While it's popping, I grab a very small pot and melt the butter.  This will only take about a minute.  Then stir in the honey and salt.  Pour this over the popped popcorn and toss to evenly distribute. 

I have also made this with coconut oil instead of the butter and this resembles much more of a sweet, less salty treat - more caramel corn like.  This is also really good if you swap the honey for pure maple syrup!

Monday, March 23, 2015

Steak Fingers

 
If you like steak - you have to try these!  This was a gold-star, family favorite growing up (when can you please seven kids?!) and still is for my family too.  Steak fingers are another one of my mom's recipes that I decided to see if I could make processed free.  These are breaded, pan-fried pieces of meat that are SO delicious and make you feel comforted deep down.  But with breading and oil come a lot of problems.  Here's another example of how a few swaps can save the day! 
 
 
1 cut of top round/round/top sirloin/sirloin steak  (my favorite is sirloin - it's the most tender)
2 eggs + 1 Tbsp. water
1 cup flour of your choice (I'll explain below - just not refined white flour!)
coconut oil
salt and pepper
 
Cut the steak into roughly 3/4 inch strips - does not have to be exact!  Lightly season with salt and pepper.  In a large frying pan, melt enough coconut oil over medium heat that it fills the pan about 1/4 inch high. 
 
 
Now you'll want to create a little assembly line on the way to the pan.  Beat the two eggs and water together in a shallow dish and season with salt and pepper.  In a separate dish, add the flour of your choosing and also season it with salt and pepper.  Here is the beauty of this recipe - I don't cook with refined white flour anymore.  I have tried every other flour in my pantry with this recipe and they have all tasted great!  I have made these with whole wheat, spelt, coconut, and almond flours and they were all good.  So decide what flour fits your needs when it comes to the type you want to use.  


Dip the steak into the egg wash, then dredge it in the flour.  Shake off the excess flour otherwise it will build up and burn in the pan. Season it again with salt and pepper after you place it in the pan.  It will take only a couple minutes on the one side, then flip and lightly season the other side too.  These cook up really fast.  You'll know when they are done because the coating will turn golden brown.  (Note: I like to use two sets of tongs - one for dipping in the egg and flour, and one for cooking in the pan.  This will save your fingers from becoming a complete mess!)


Drain these on a plate lined with a double layer of paper towels.  Because you are cooking these in batches, I like to loosely place a piece of aluminum foil over the plate to keep them warm.  I find that I have enough to fill the plate then add a second layer of paper towels and continue the process. 

 
When you have cooked them all, they are ready to eat.  My family is split on how to eat them.  Some like them just how they are and some like to lightly dip them in steak sauce, which is not completely clean, but delicious.  You can make a homemade, cleaned-up version of steak sauce, it just takes a little more time, but I think it's worth it if you prefer these with sauce.  If you like them plain, you're good to go!  This will serve about 4 adults.  


Wednesday, January 14, 2015

"Refried" Beans

 
I love refried beans!  I am from the Southwest and this is one of the staples to the region.  I do not, however, like canned refried beans - never have.  They taste stale and too doctored.  Refried beans should be simple and clean in flavor.  Let the beans be the star.  My mama taught me how to make her recipe, and they couldn't be simpler!  Of course, they are processed free and you only need three ingredients.  The best part is there is no frying involved.  Put easy "refried" beans on the menu!
 
2 lbs. dried beans (pinto or pink)
water
2 Tbsp. sea salt
 
Pour the dried beans in a large pot.  Now add about 3 times as much water as the beans.  You need a lot of water because the beans will soak them up.  Bring this to a boil, then turn this down to a simmer with the lid slightly ajar for about an hour and a half.  Occasionally stir it, but don't feel like you have to babysit this at all.  After that time has passed, it should look something like this.  The beans have soaked up a lot of the water and are getting soft.  Now, stir in the salt.  You can't add the salt at the beginning or it will make the beans kind of tough. Put the lid back on, slightly ajar and let this simmer another hour to hour and a half.  
 

The beans will have soaked up even more water and been seasoned by the salt.  Turn off the heat and mash the beans.  You can use a potato masher, a blender, a food processor, whatever you have.  I like to use my immersion blender and puree them right in the pot.  If they seem too dry at any point (during cooking or blending) you can always add a little more water.  That's it!  Told you it was easy.

 
Here are a few ways to use them: make bean burritos, dip or layered dips, Mexican pizzas, tostadas, soft or hard tacos, add them to soup, use them in casseroles, etc.  These are also the perfect side dish for a Mexican feast.  I personally love to smear these on homemade Indian Fry Bread!  Another bonus is that ALL my kids like these beans - that makes this a winner of a recipe.  They also freeze really well, so don't throw our any left overs.  Whether you have a lot of dried beans lying around, want another option besides meat or just love refried beans, I hope you'll give these a try!


Tuesday, December 2, 2014

Whole Wheat Chocolate Chip Cinnamon Rolls


Some good friends of ours used to make these biscuit chocolate chip cinnamon rolls for our family and deliver them warm to our door.  Talk about irresistible!  When we moved away, I knew I wanted to get the recipe, but I wanted to try making these processed free.  What I found was that my kids loved them just as much as ever - success!  Because it's a biscuit dough, these are super simple, don't require a rise time, and there is no glaze or frosting needed.    

Dough:
2 cups whole wheat pastry flour
3 Tbsp. sucanat or coconut palm sugar
4 tsp. baking powder
1 tsp. salt
1/2 cup shortening (non-hydrogenated)
3/4 cup milk

Filling:
3-4 Tbsp. melted butter
sucanat
cinnamon
chocolate chips

Preheat oven to 450 degrees.  Combine the flour, sugar, baking powder and salt in a medium sized bowl.  Add the shortening and use a pastry cutter to combine them until it looks like crumbs.  Add the milk and stir into the dough.  Add a little flour to knead it into a ball.  Sprinkle flour on a flat surface and roll it into a flat rectangle.  Cover the flattened dough with melted butter and sprinkle the dough with the desired amount of sucanat, cinnamon, and chocolate chips.


Roll into a log and cut into 12 pieces - about 1 inch thick.  place on an ungreased cookie sheet and bake for 12 minutes. 


I use dental floss to cut them by sliding it under the log, then pulling the two sides to meet and make a nice cut without squishing the dough.  I also cut it in half first, then those two pieces in half and each of those into three to make the pieces pretty even. 

I know I'm a bit vague about the amounts for the filling, but you can really just eye ball what will cover the dough and how much or little you like of each component - ex. more cinnamon, less chocolate chips.  These are fast and very forgiving if you are allowing your kids to help in the whole process as well.  Have fun with it!

Thursday, November 6, 2014

30 Second Raspberry Cinnamon Jam


This "recipe" is one of those everyday, I don't think about this as a recipe, kind of foods.  This is my version of raspberry jam with the added warmth of cinnamon.  I make this all the time, especially for sprouted grain toast or bagels in the morning, but because I only make as much as I need for one time and always eye-ball the proportions, I hesitate to call it a recipe.  It's sweet, and tart with a hint of spice, and of course, processed free. Here's the idea of it:
 
a handful of fresh raspberries
a sprinkle of coconut cinnamon sugar (find it here)
 
Put the raspberries in a small bowl, shake the desired amount of coconut cinnamon sugar on top and proceed to mash and mix it all together with the back of a spoon.  This works best with raspberries as opposed to other berries because they easily separate, yet remain gelatinous like a jam or jelly.  Now you can use this however you like.  I only use about a 1/4 tsp. or less of the coconut cinnamon sugar - it truly is just a sprinkle, but add what you like.  I hope you enjoy this - we certainly do!


Tuesday, September 23, 2014

Mini Spelt Flour Pumpkin Spice Donuts


 It's the first day of fall!  I like fall, not winter so much, but pumpkin and apple everything is exciting!  My kids and I have been talking about the pumpkin patch and that got me thinking about all the pumpkin goodies.  I wanted to make something we could all enjoy that was delicious and processed free.  Why not pumpkin spice donunts?  These have no refined sugar or flour, but are just as good as any other pumpkin treat you will have this season.  I made them in my mini donut maker (thanks mom!), but you could do this in the oven with a regular size donut pan.  I'll warn you ahead of time - these are addicting.  You'll want it to be fall all the time!
 
1 3/4 cups whole spelt flour (I like sprouted spelt flour best)
1/2 tsp. cinnamon
1/2 tsp.nutmeg
1/2 tsp.allspice
1/8 tsp.ground cloves
2 tsp.baking powder
1/2 tsp.salt
3/4 cup pumpkin puree
1/2 cup milk
1/2 cup sucanat or coconut palm sugar
1/3 cup melted coconut oil
1 large egg
1 tsp.vanilla extract
 
For the cinnamon sugar topping:
2 Tbsp. cinnamon
2/3 cup coconut palm sugar
4 Tbsp. melted butter
 
In a large bowl, combine flour, cinnamon, nutmeg, allspice, cloves, baking powder and salt.  In a separate bowl, mix the pumpkin puree, milk, sucanat, coconut oil, egg and vanilla.  Pour the wet ingredients into the dry ingredients and combine using a rubber spatula just until moist. Scoop this into a gallon size zip-top bag and cut the bottom corner to create a piping bag.
 

When the mini donut maker is heated, pipe the batter in a circle inside each donut shape.  Close the lid and wait until they are cooked through.  Place on a sheet of paper towels to cool completely.  Dip each donut top in the melted butter and then into the cinnamon-sugar mixture. The batter is not overly sweet for this very reason.  Now, devour!  I'm not going to lie, these are fabulous with some homemade apple cider!  You could also enjoy these while sitting on your back porch cuddled up with a blanket watching the fall leaves - just saying.